Task: The appearance of the gadget will be redesigned ergonomically. A critical aspect was the design of an injection-molded plastic casing. Despite the fact that this procedure is substantially more expensive during the first stage of mould creation, it significantly decreases the cost per unit of items produced in series and ensures a high-quality look.
How was it accomplished: Our team executed the entire project, including the creation of three prototypes and production support. Calibration board, specialists sketched, developed designs, created 3D models, and documented the manufacturing process.
Additional information:
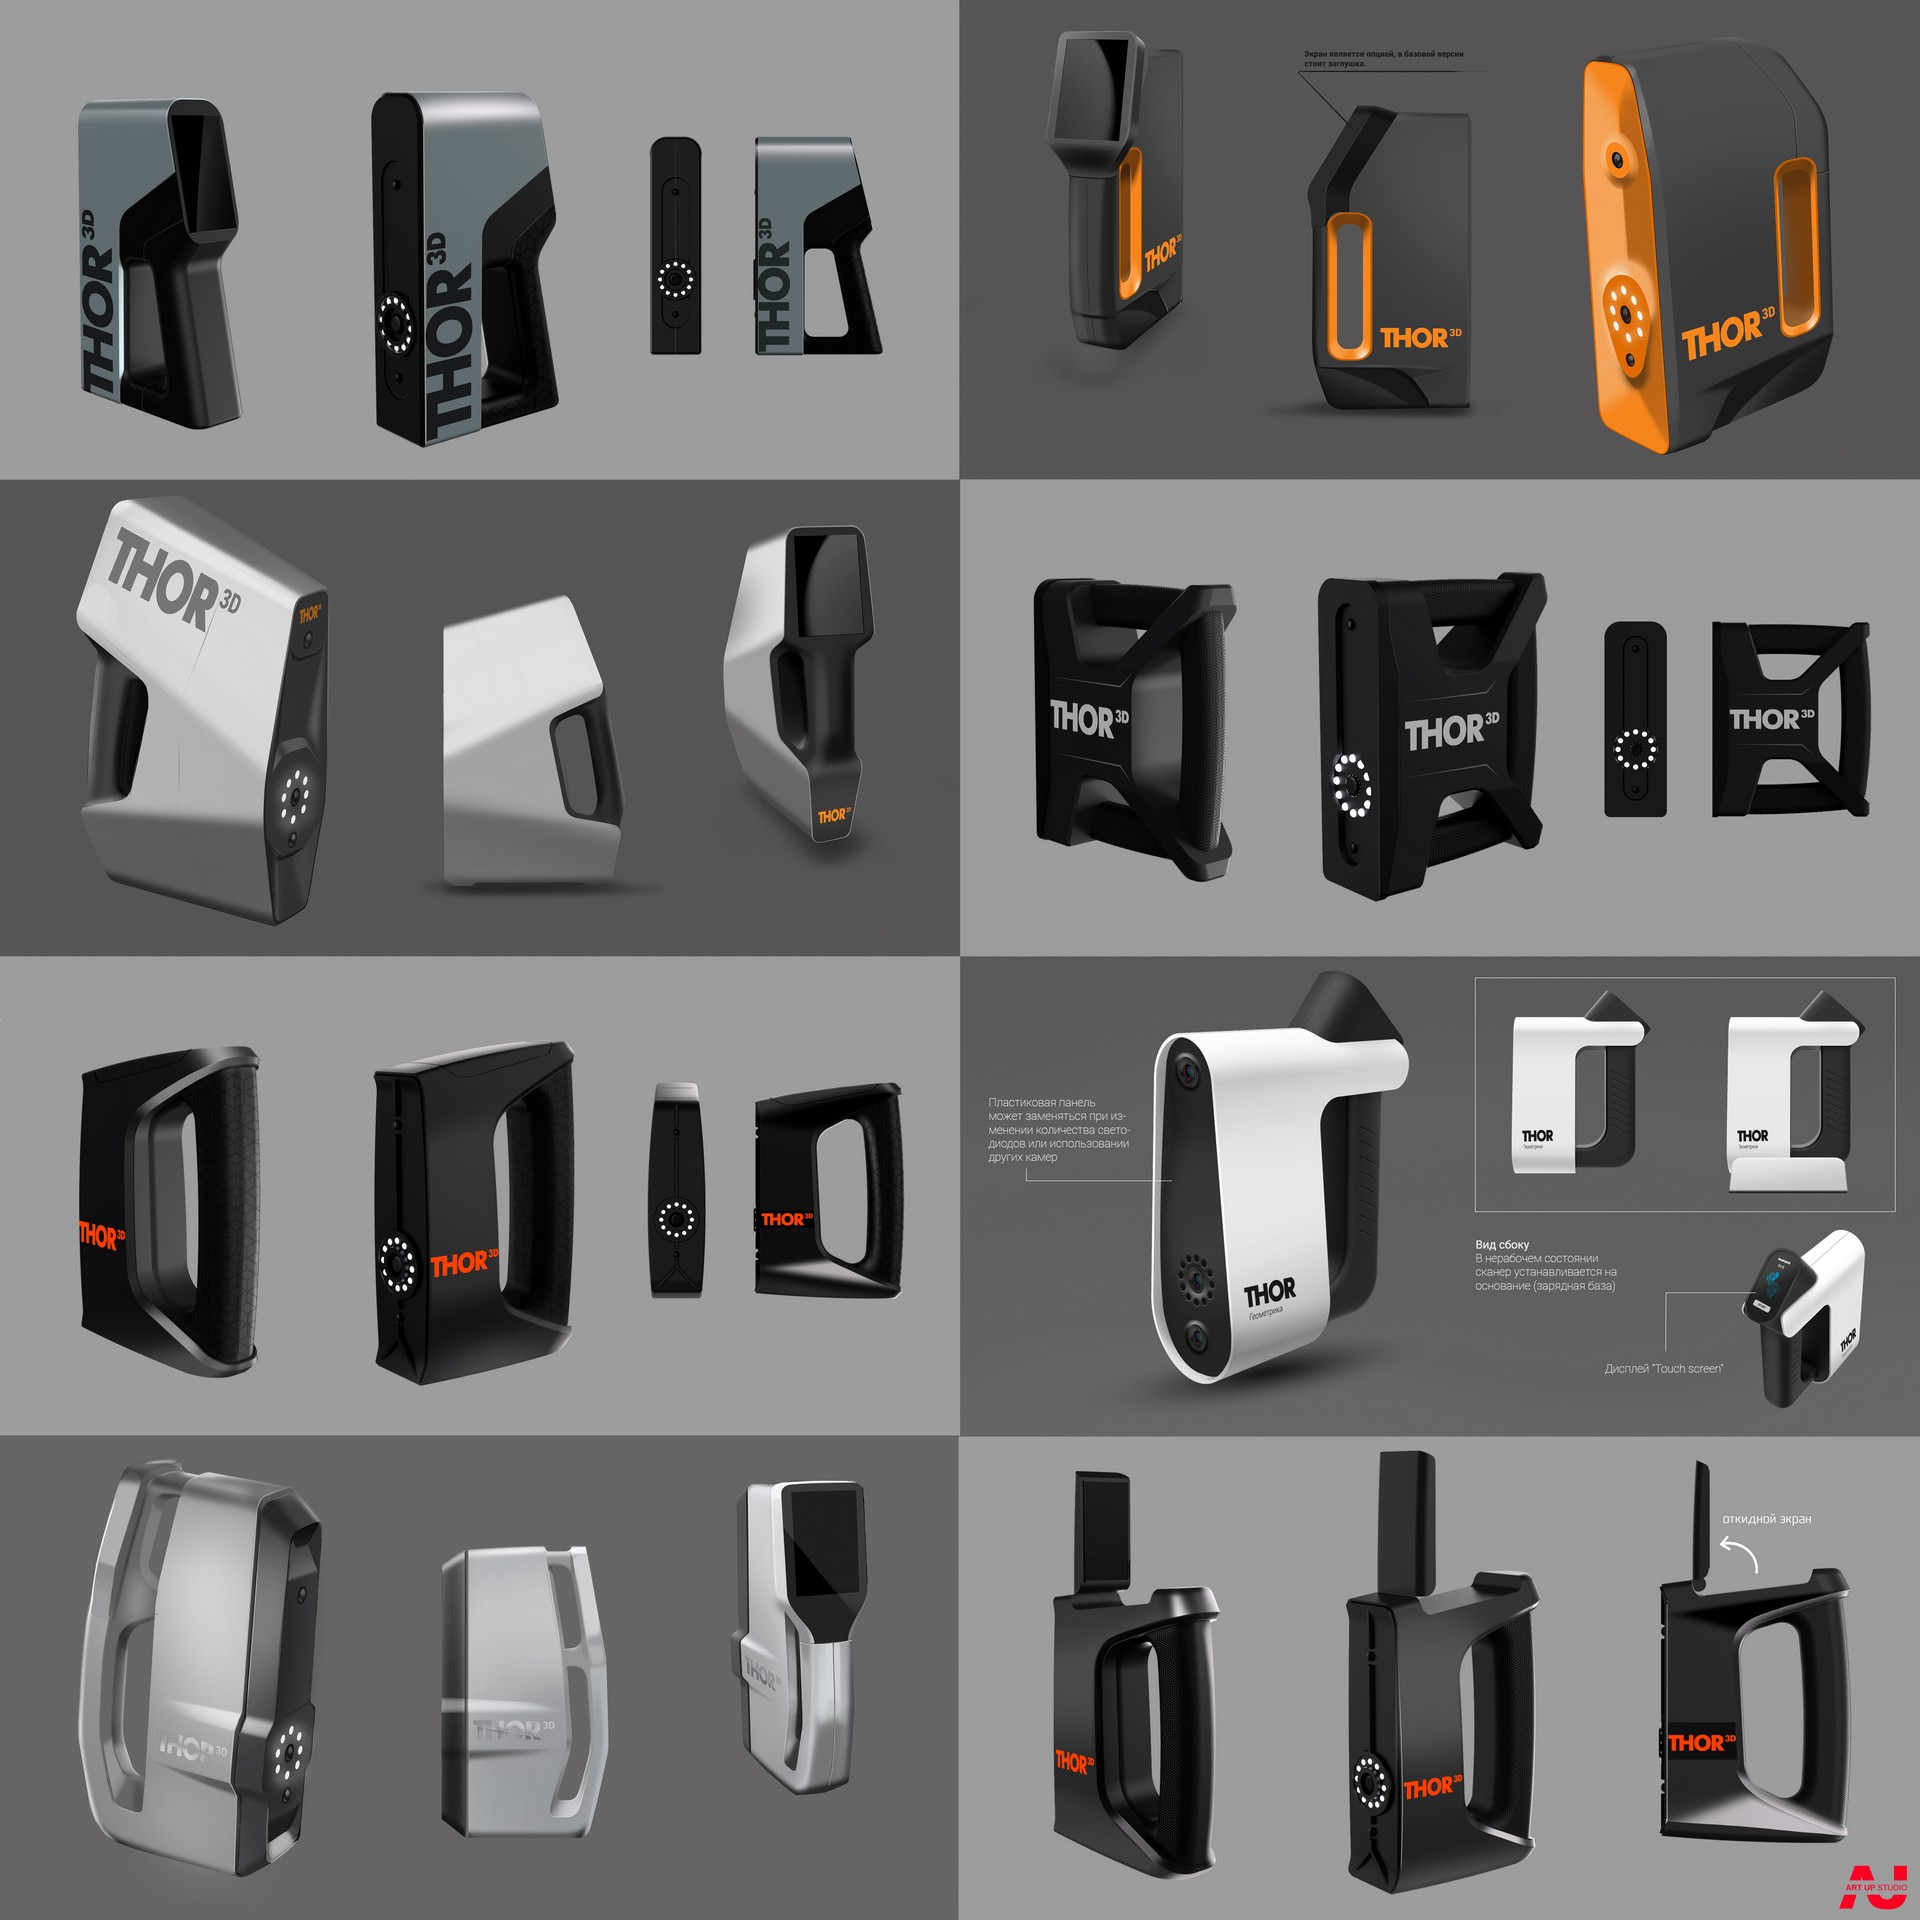
- Creating a sketch of a device's eight possible appearances.
- Displaying two choices that have been chosen.
- Creating button and front panel design.
- Internal parts and boards are laid out according to the customer's specifications.
- Creating an optical bracket that meets the following requirements: it must be prefabricated but can be modified in the future; it must be cast metals; it must be simple to manufacture at the customer's own production; it must be light; it must be easy to install components such as boards, lenses, and so on; and it must be mounted on a tripod for calibration.
- Construction of the main body of the resultant optical bracket.
- Designing the scanner's pen, as well as verifying and implementing it.
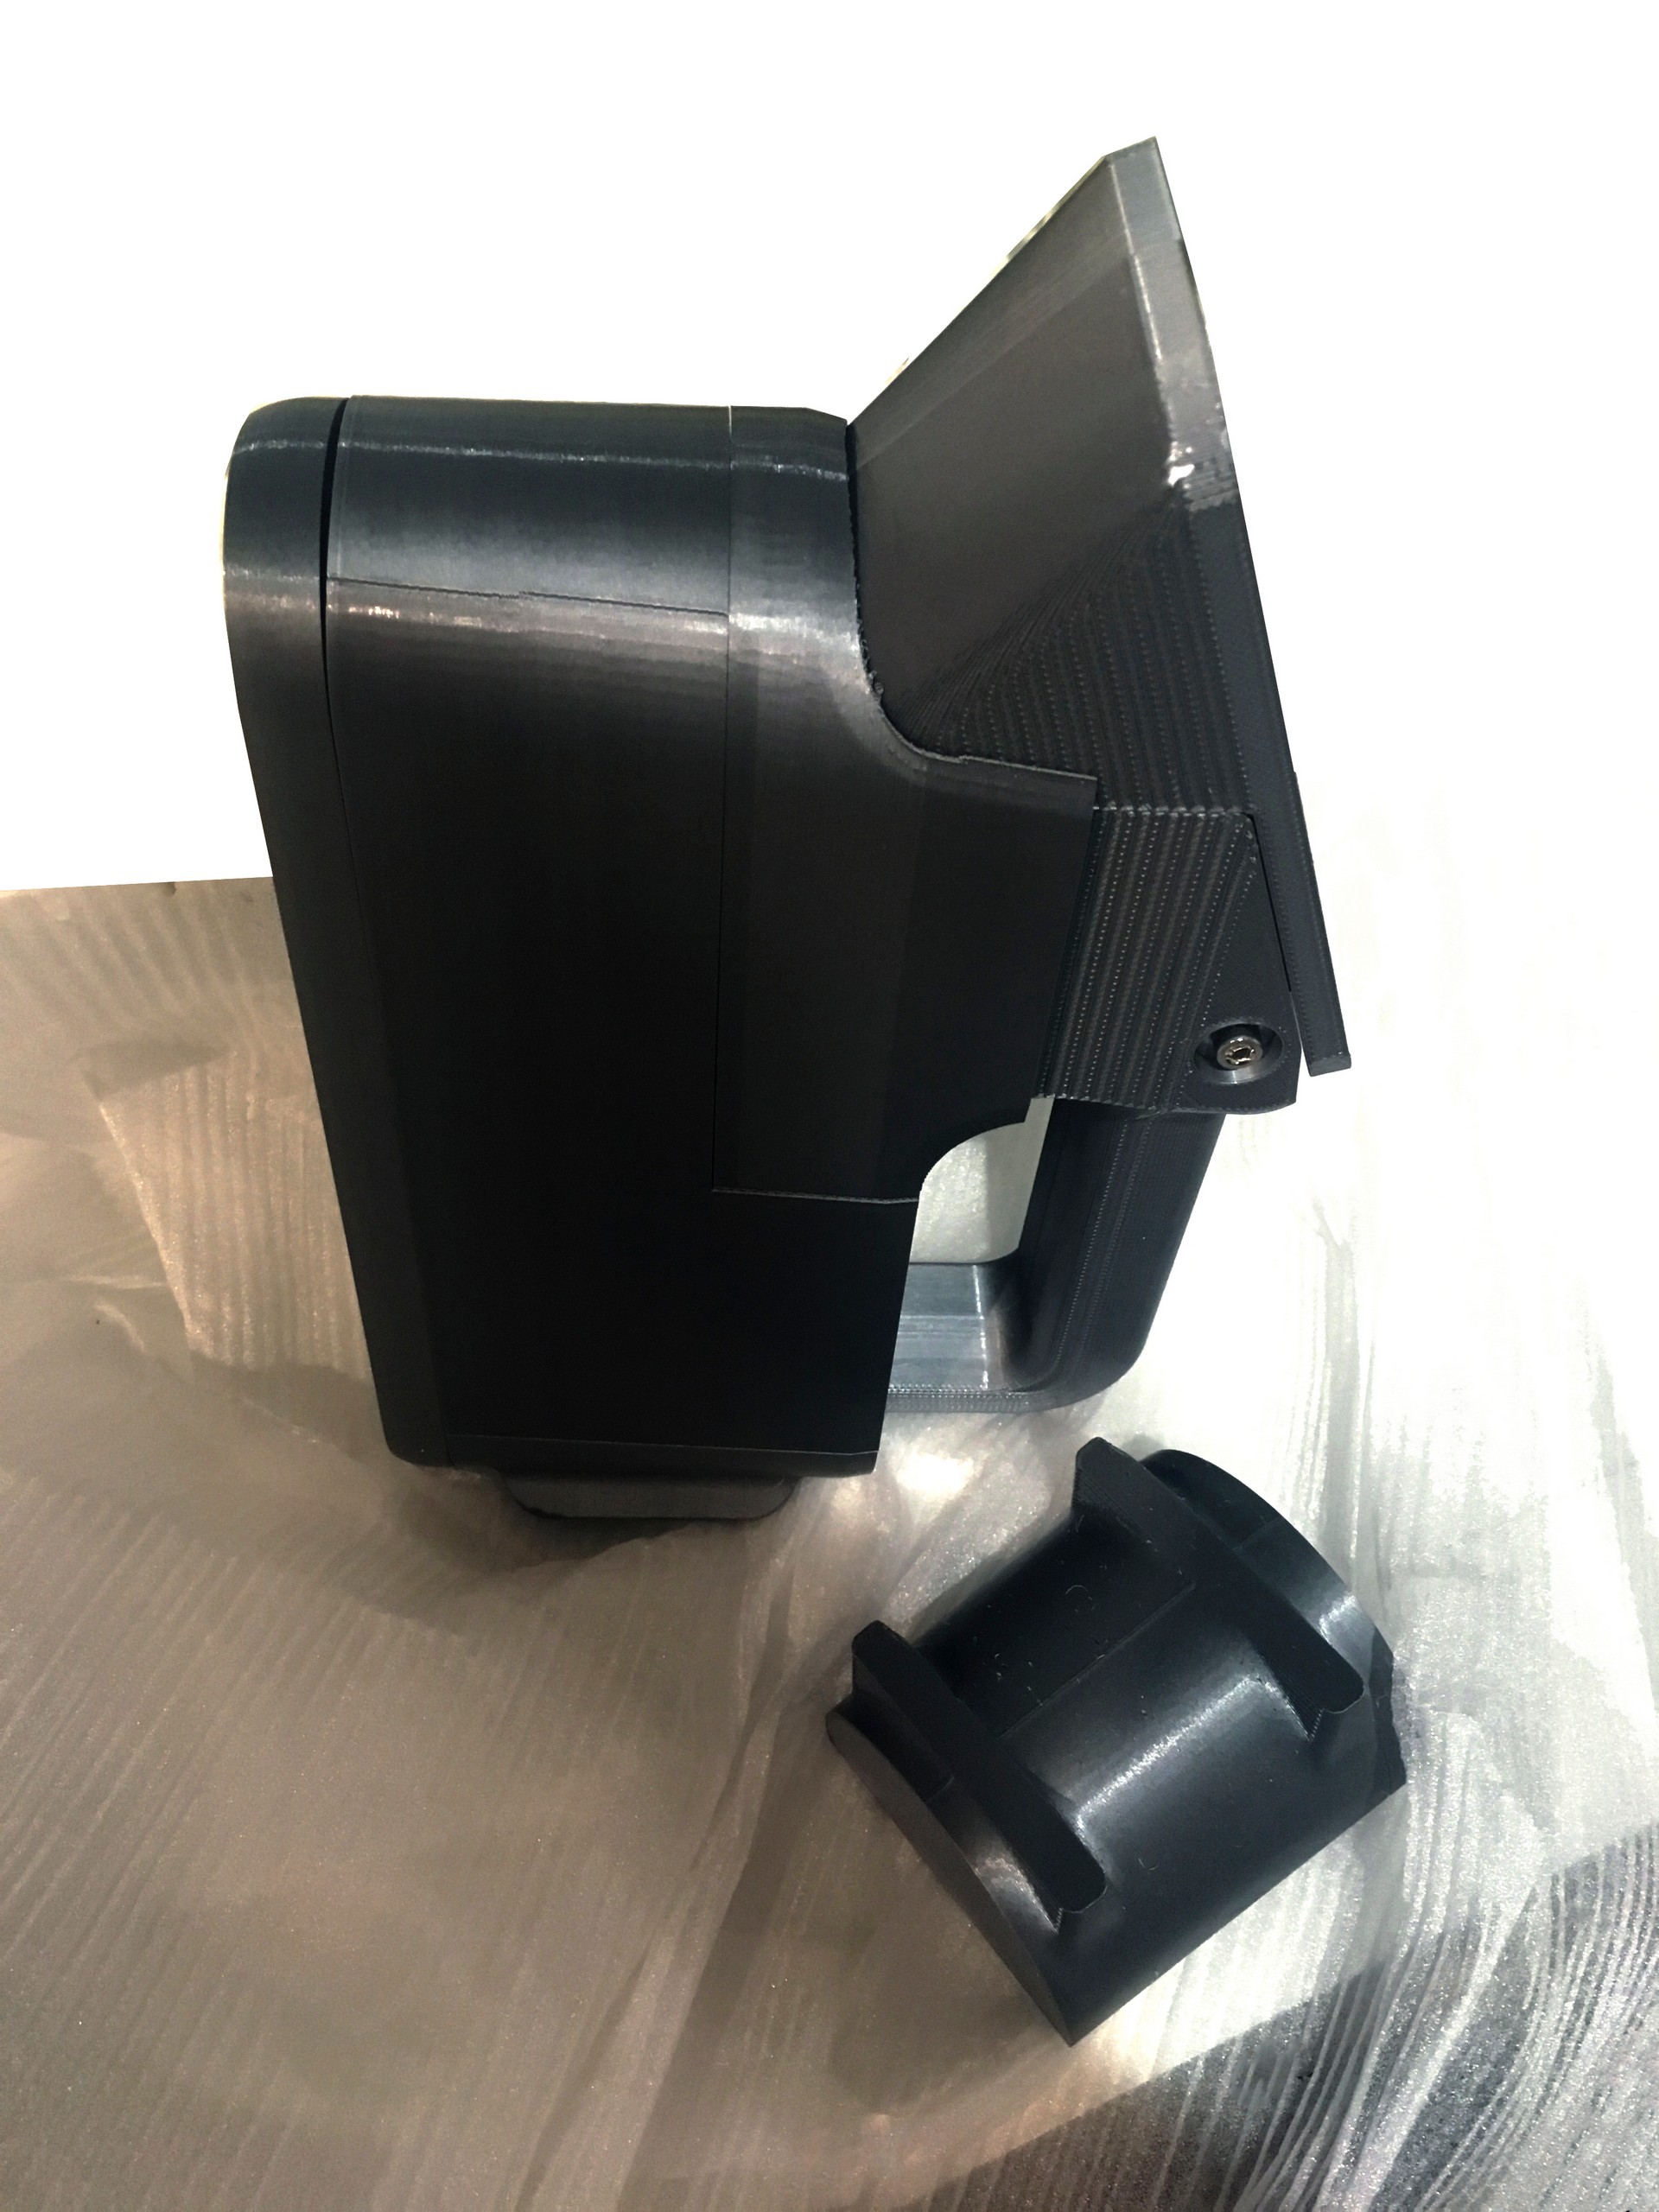
- Creating a 3D Picaso prototype.
- Assistance of the production.Communication and resolution of technological challenges during the mold-making and casting processes
Work stages:
Sketching process (some of the options)
The customer's primary objective was to create a scanner that was distinguishable from current equivalents and stood out against their competitors with an eye-catching design. As a result, various possible styles were offered at the first stage.
The studio's team worked on developing concepts in order to obtain the most diverse possibilities.
Creating a visual representation of the options that have been selected.
In the preliminary study, the customer picked between two stylistic orientations. The comparison table below illustrates their evolution.
Individual features such as connector ports, ventilation holes placement, and variants in the front panel design were drawn.

Option #2 (on the right) successfully completed the race.
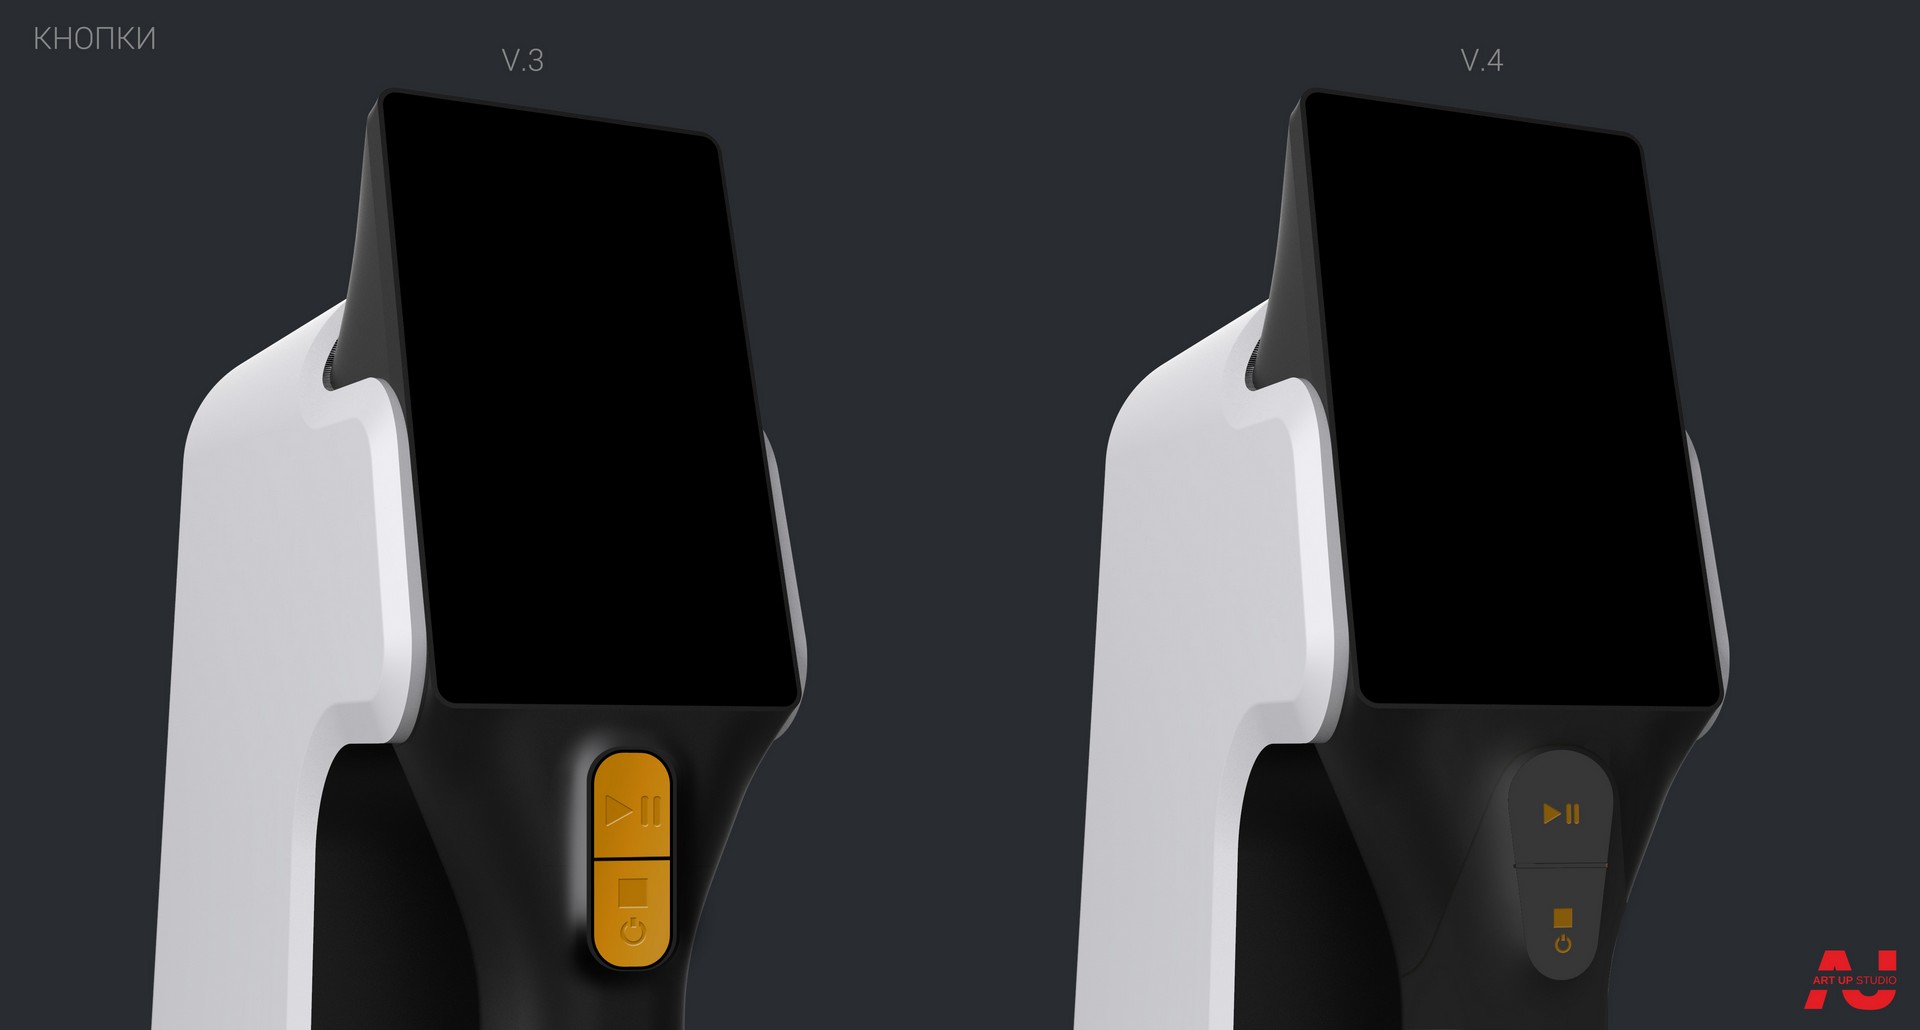
Button and front panel design alternatives.
Because the form and materials of the buttons were determined independently for each product, design is critical in every aspect.
Various design alternatives have been suggested, including the following:
-The two-component casting allows for integration into the housing.
- A distinct TPE element.
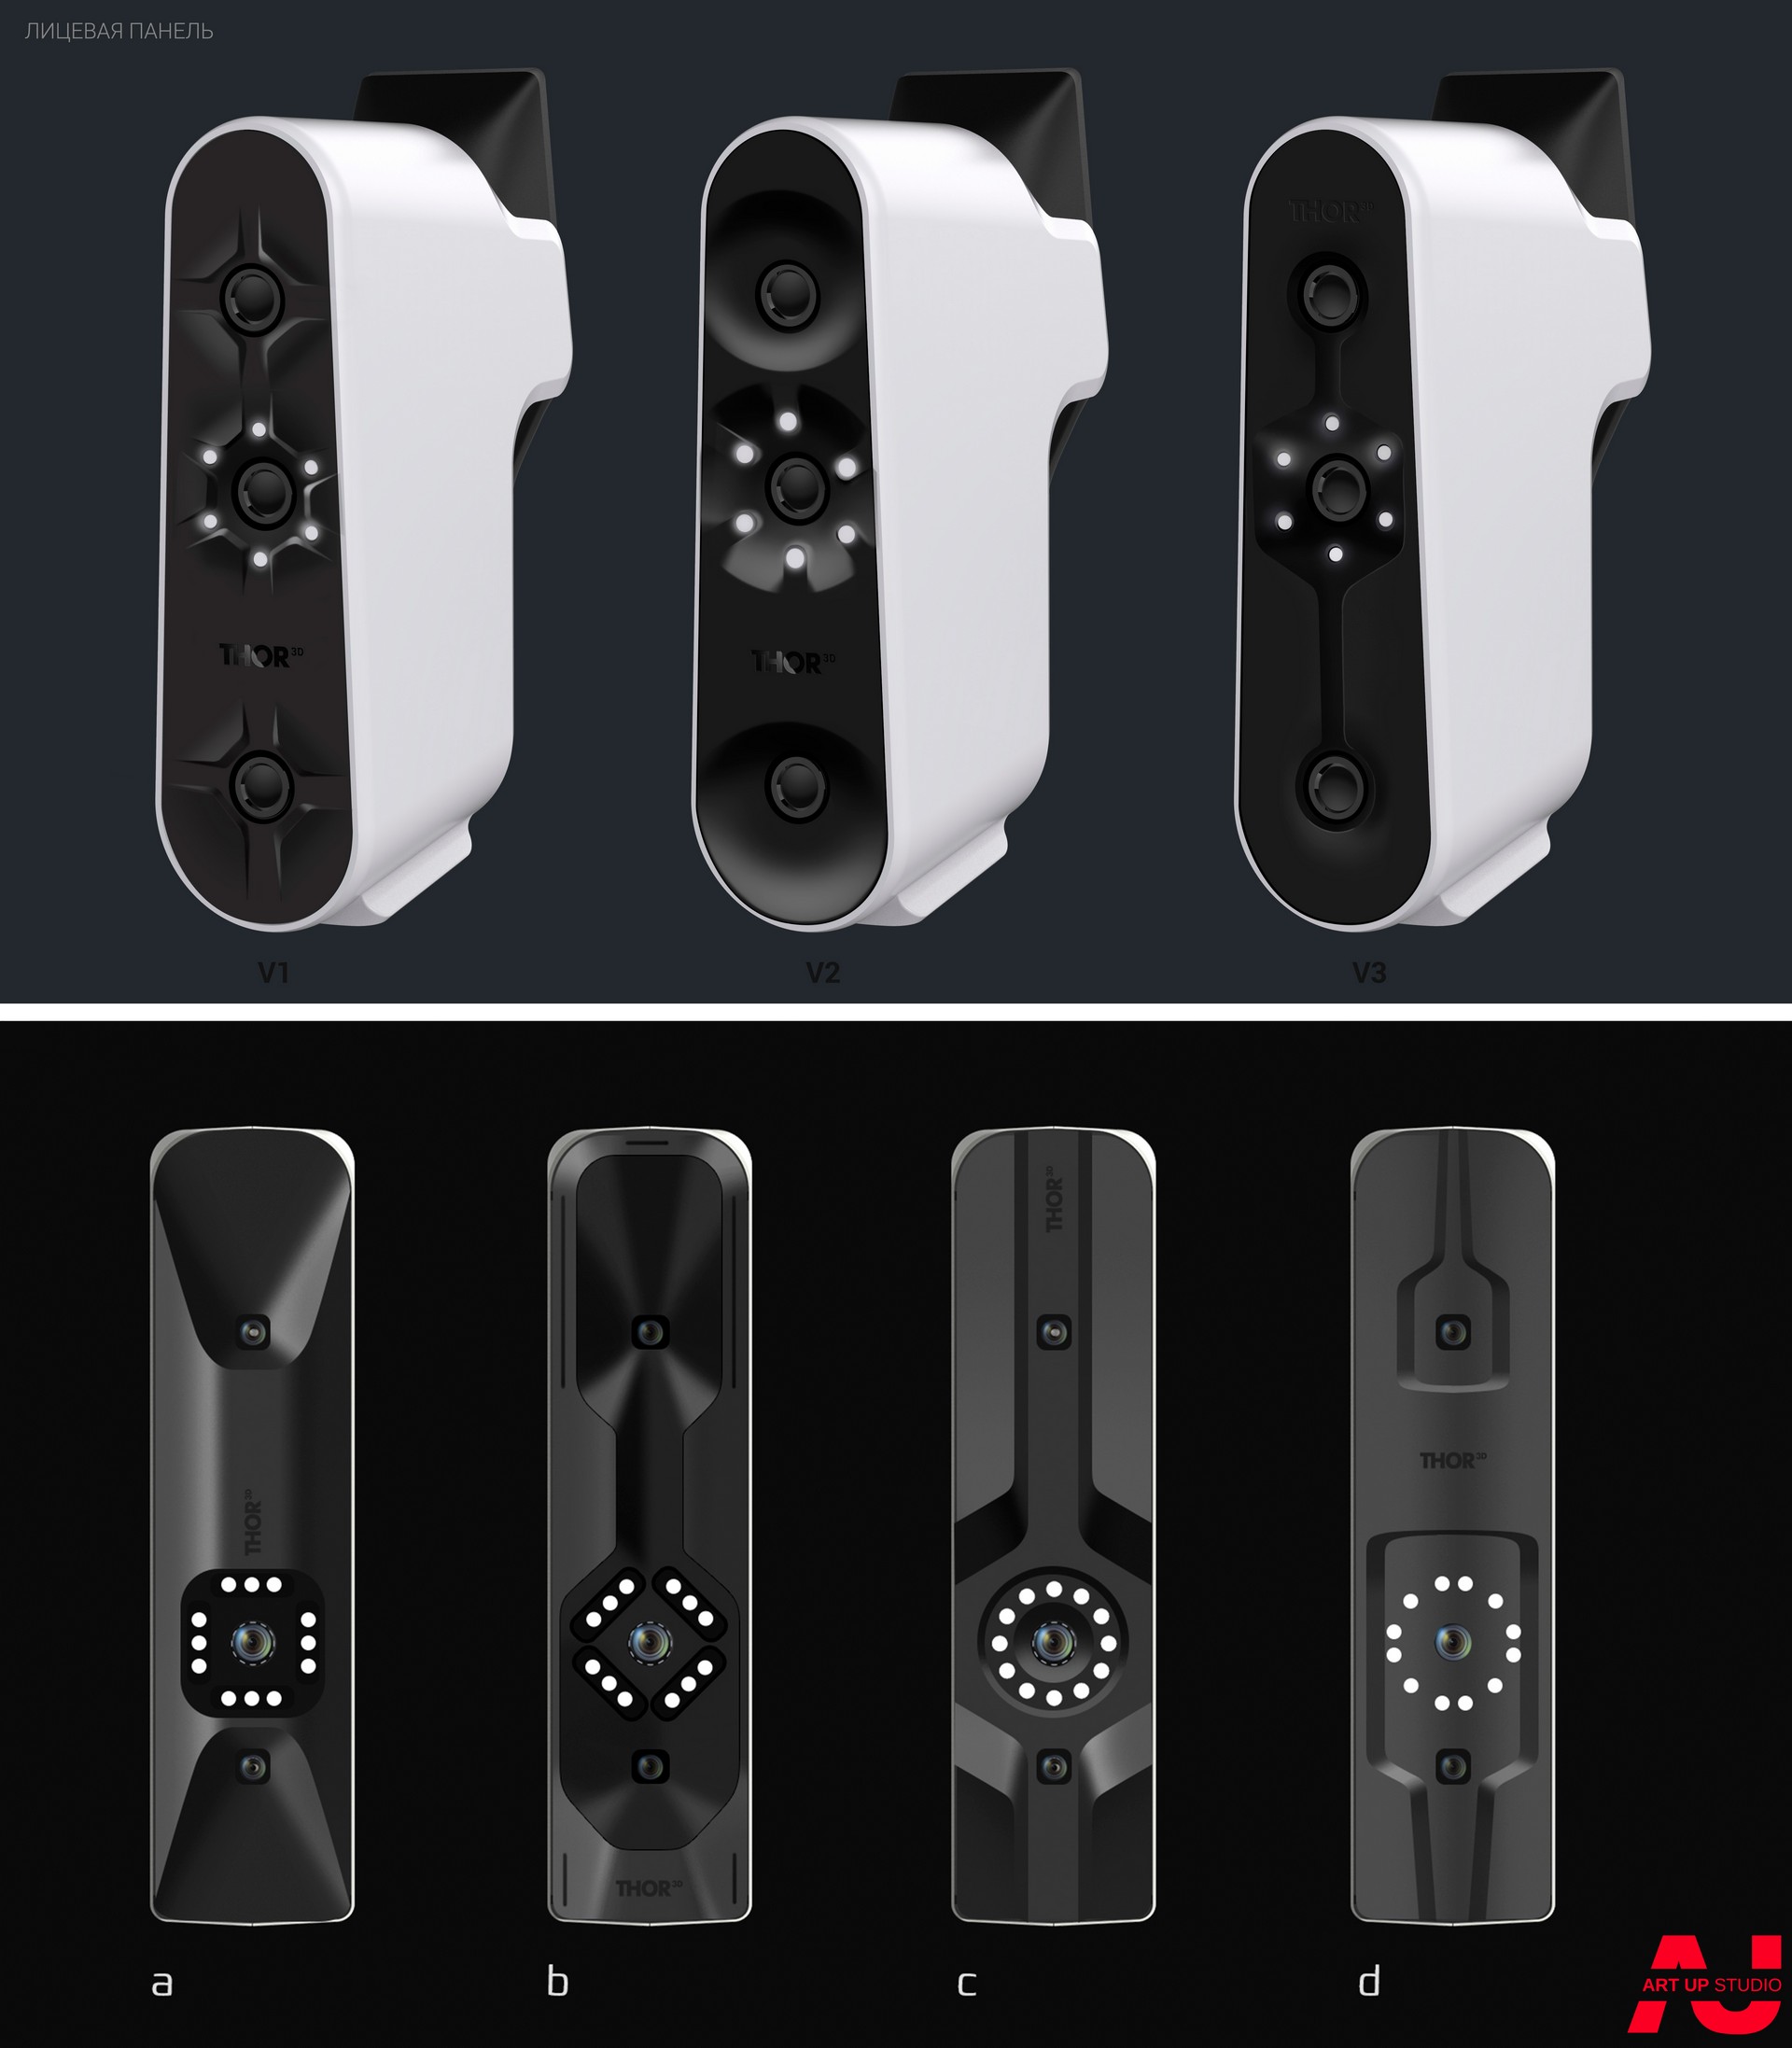
Additionally, the scanner's front panel was not spared, which contains the optics and diode lighting. Because the front panel is a critical functional component of a 3D scanner, it was essential to beat and emphasise key features with forms in order to produce a recognised and eye-catching look among rivals.
Numerous modifications to the front panel's design were suggested.
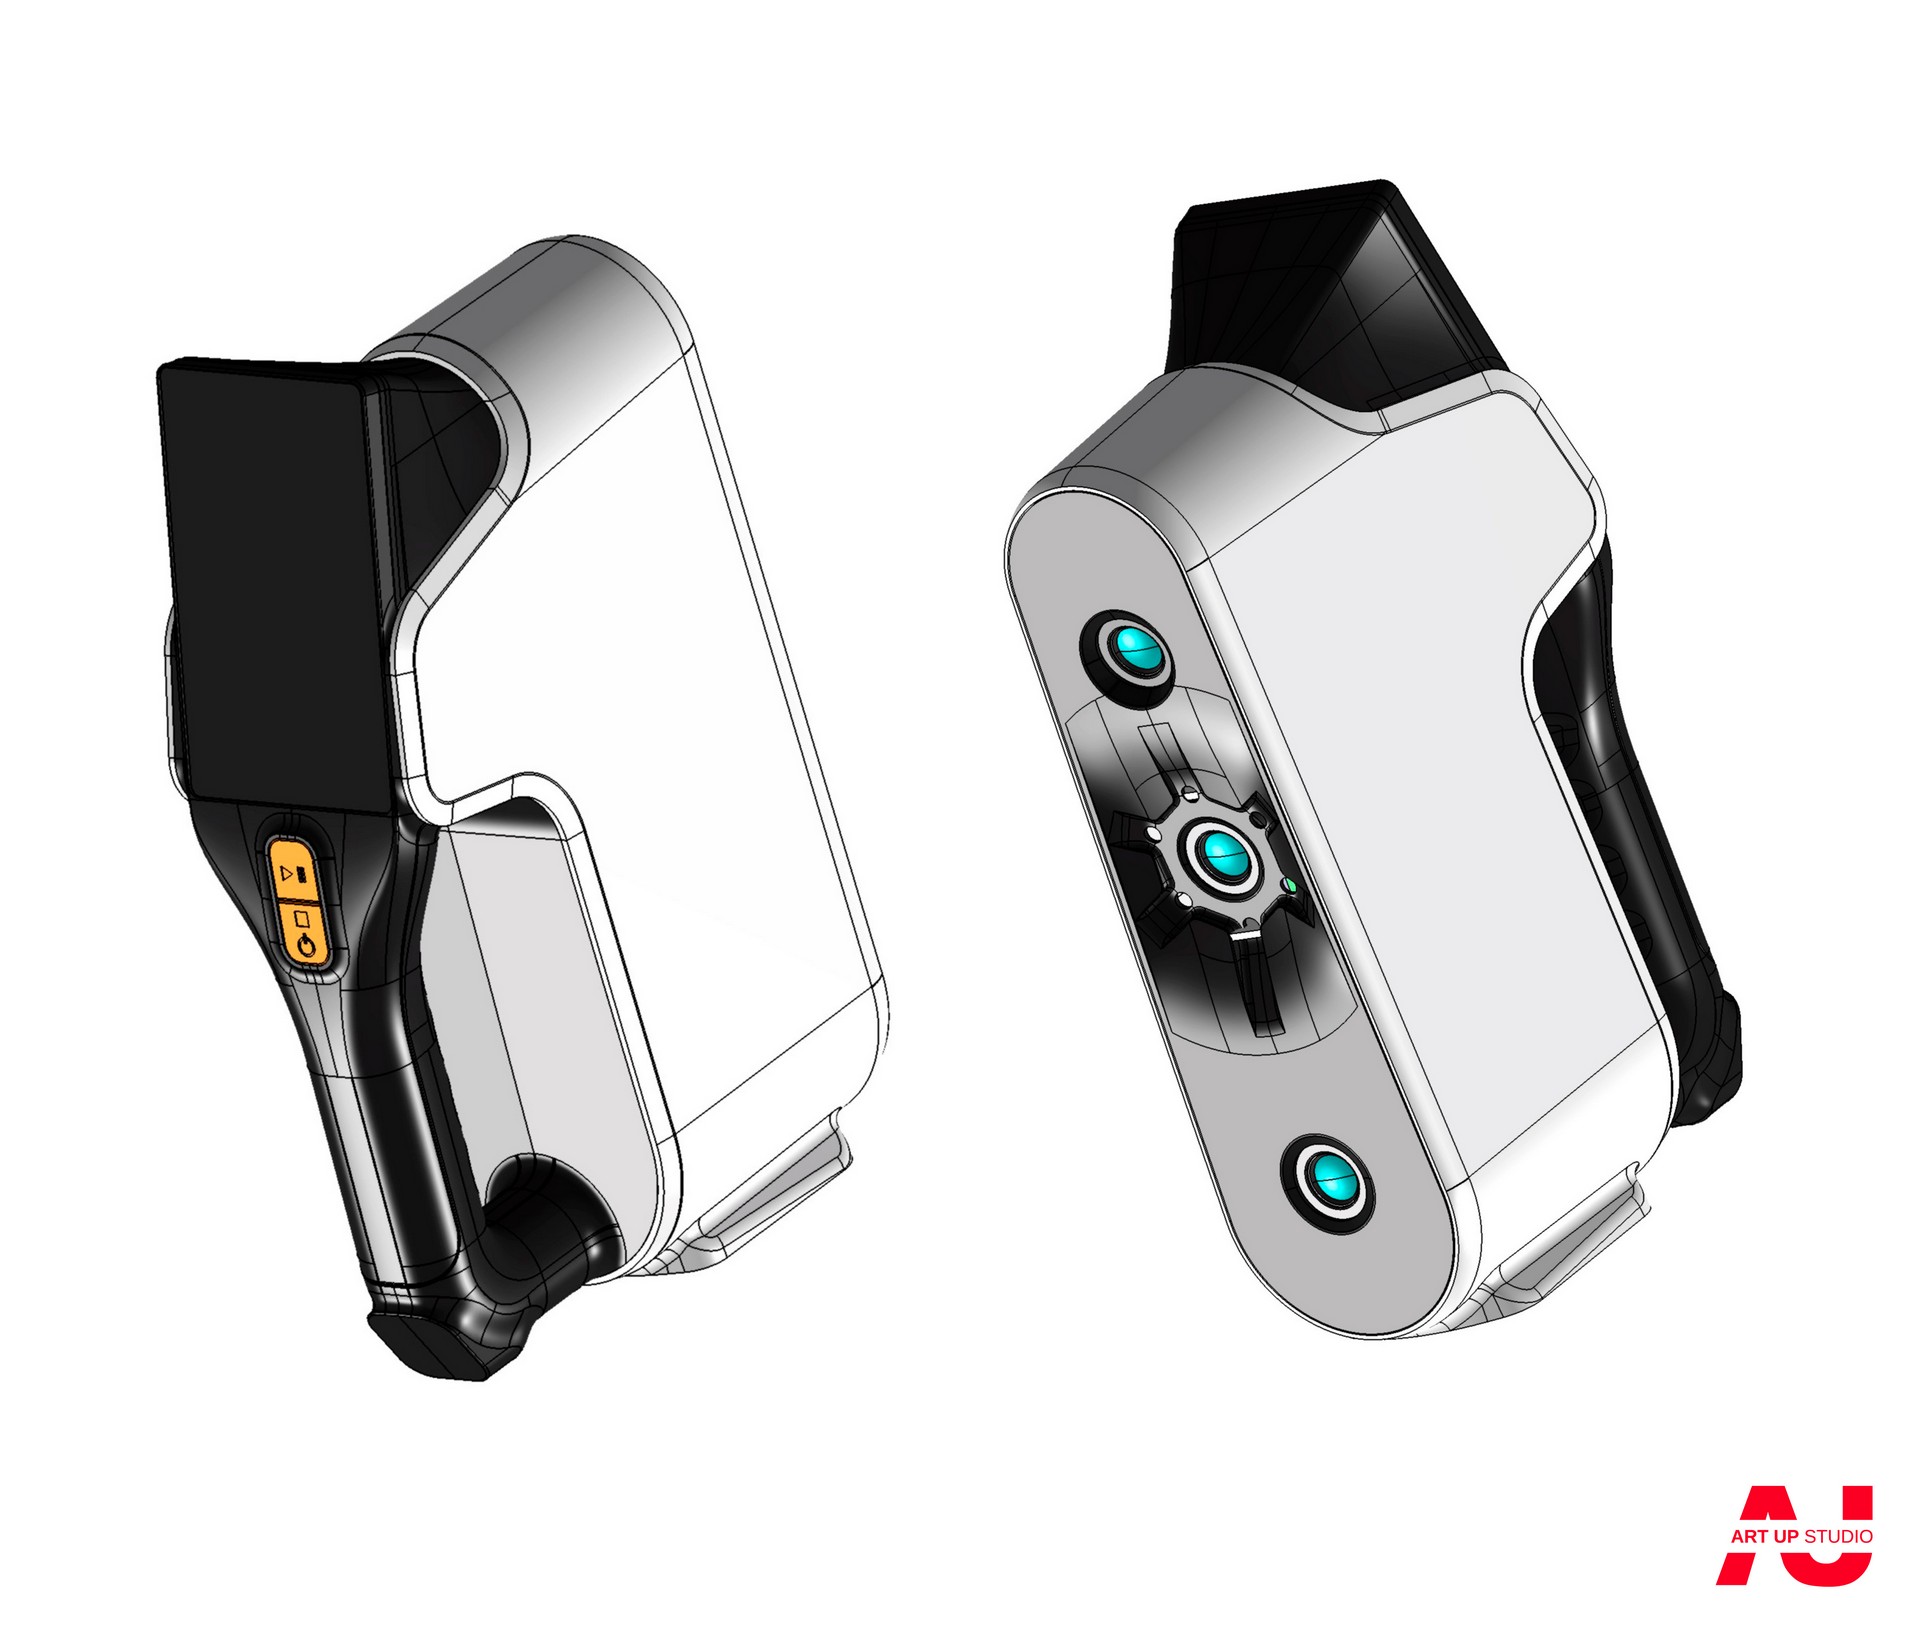
3D modeling
At this point, the refined sketch is translated into 3D reality, and the future gadget takes on the shape imagined by the designers.
The designer builds a 3D model of the device, taking into account all stylistic and plastic changes indicated in the designs, while already working with a well-developed layout of the device and knowing the exact dimensions and position of internal components.
Additionally, the designer establishes the model's essential technological parameters, such as injection moulding slopes and required plastic thicknesses.
Ergonomic layout
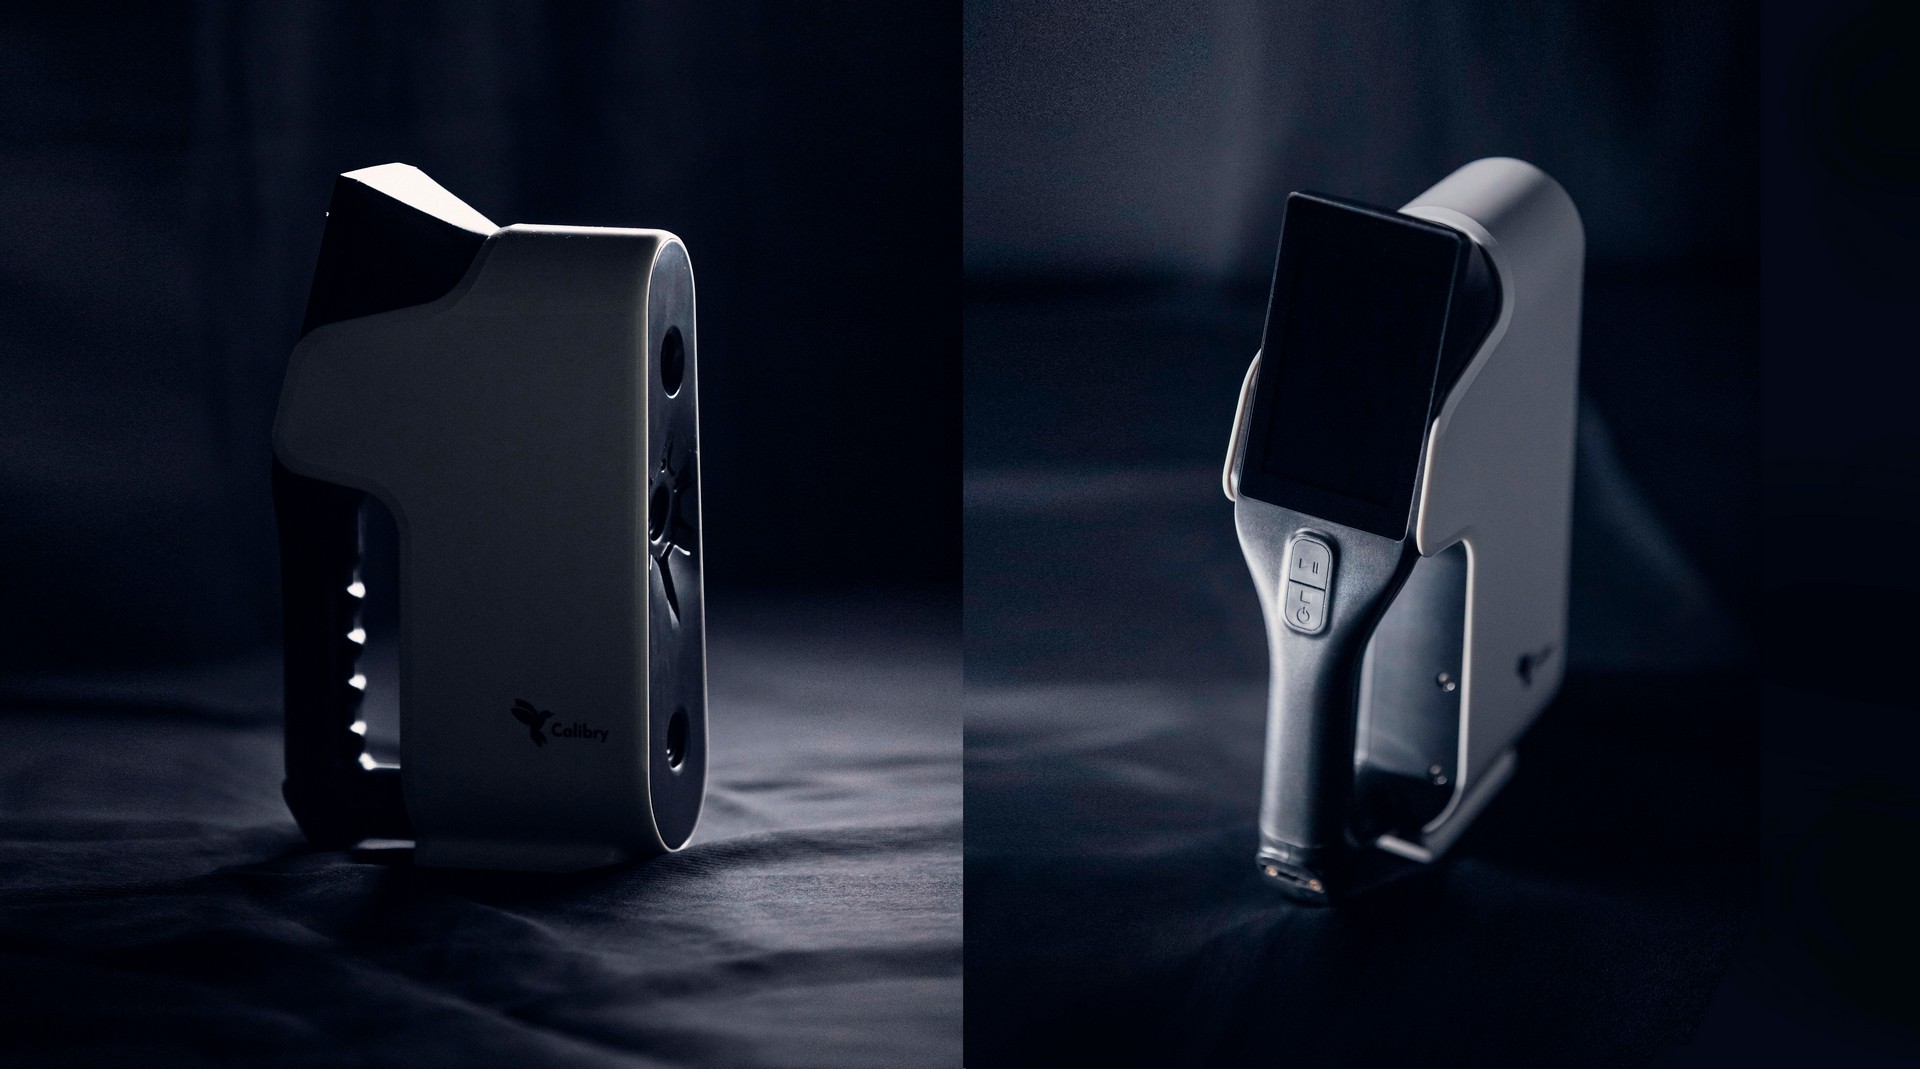
Following the sketching step, our studio developed an ergonomic layout on which the handle's ergonomics were determined and the screen's ideal degree of inclination was computed.
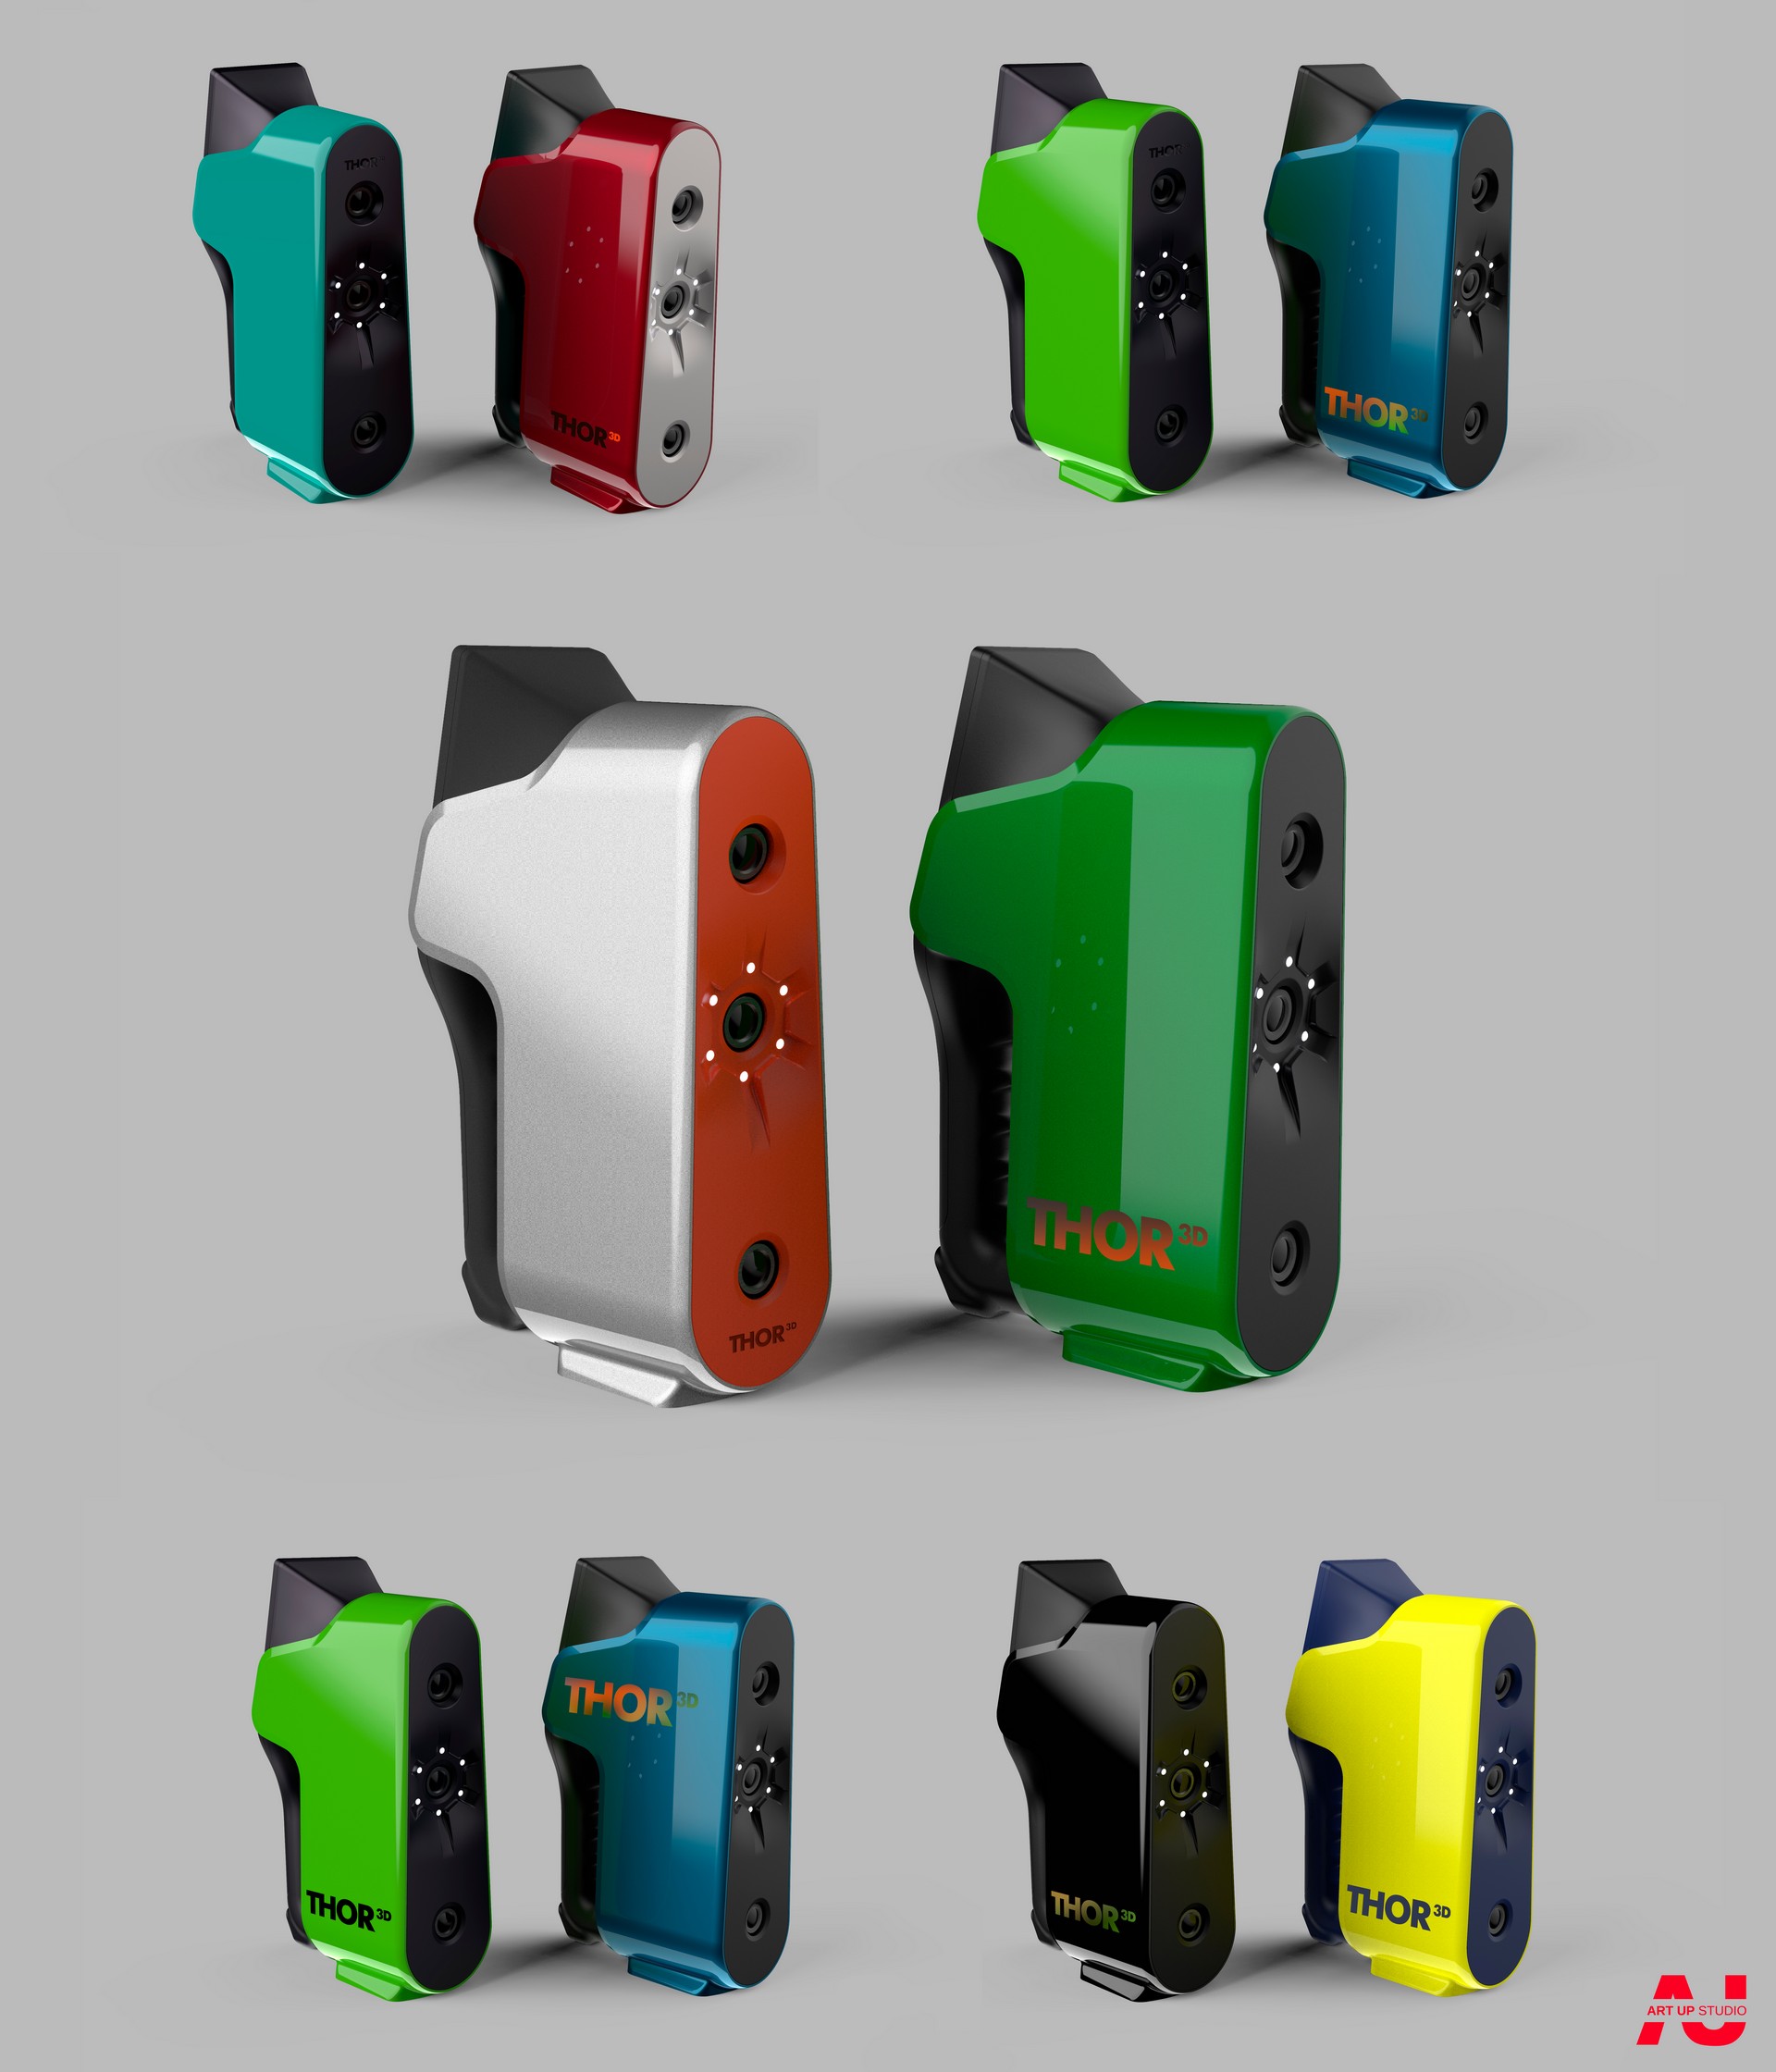
Color solution development
The job was to create and pick a colour scheme and graphic design for the scanner based on the findings of the 3D modelling.
Our design team came up with a variety of colour schemes with diverse materials. We attempted to incorporate a variety of solutions into these versions, ranging from conservative and beautiful colour schemes to extremely brilliant and out of the ordinary for this sort of equipment.
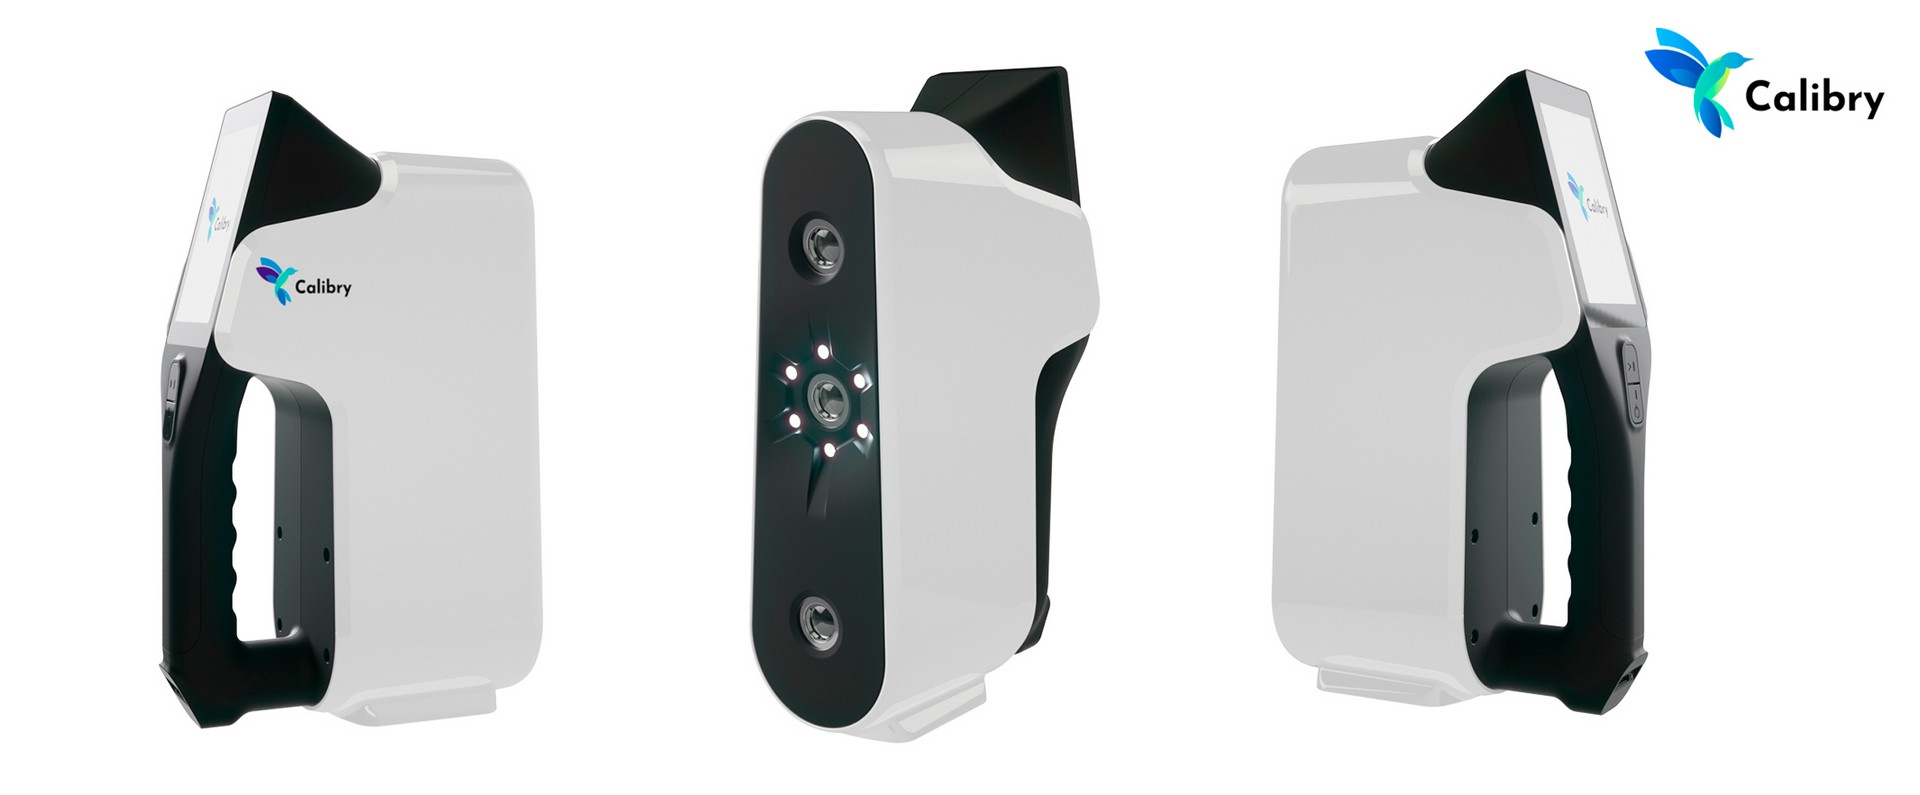
As a consequence, the buyer selected the most traditional option: a white gloss casing with black matte detailing (a handle with a screen frame and a front panel).
Additionally, other variations on the location and style of the logo were offered, which were finally rejected.
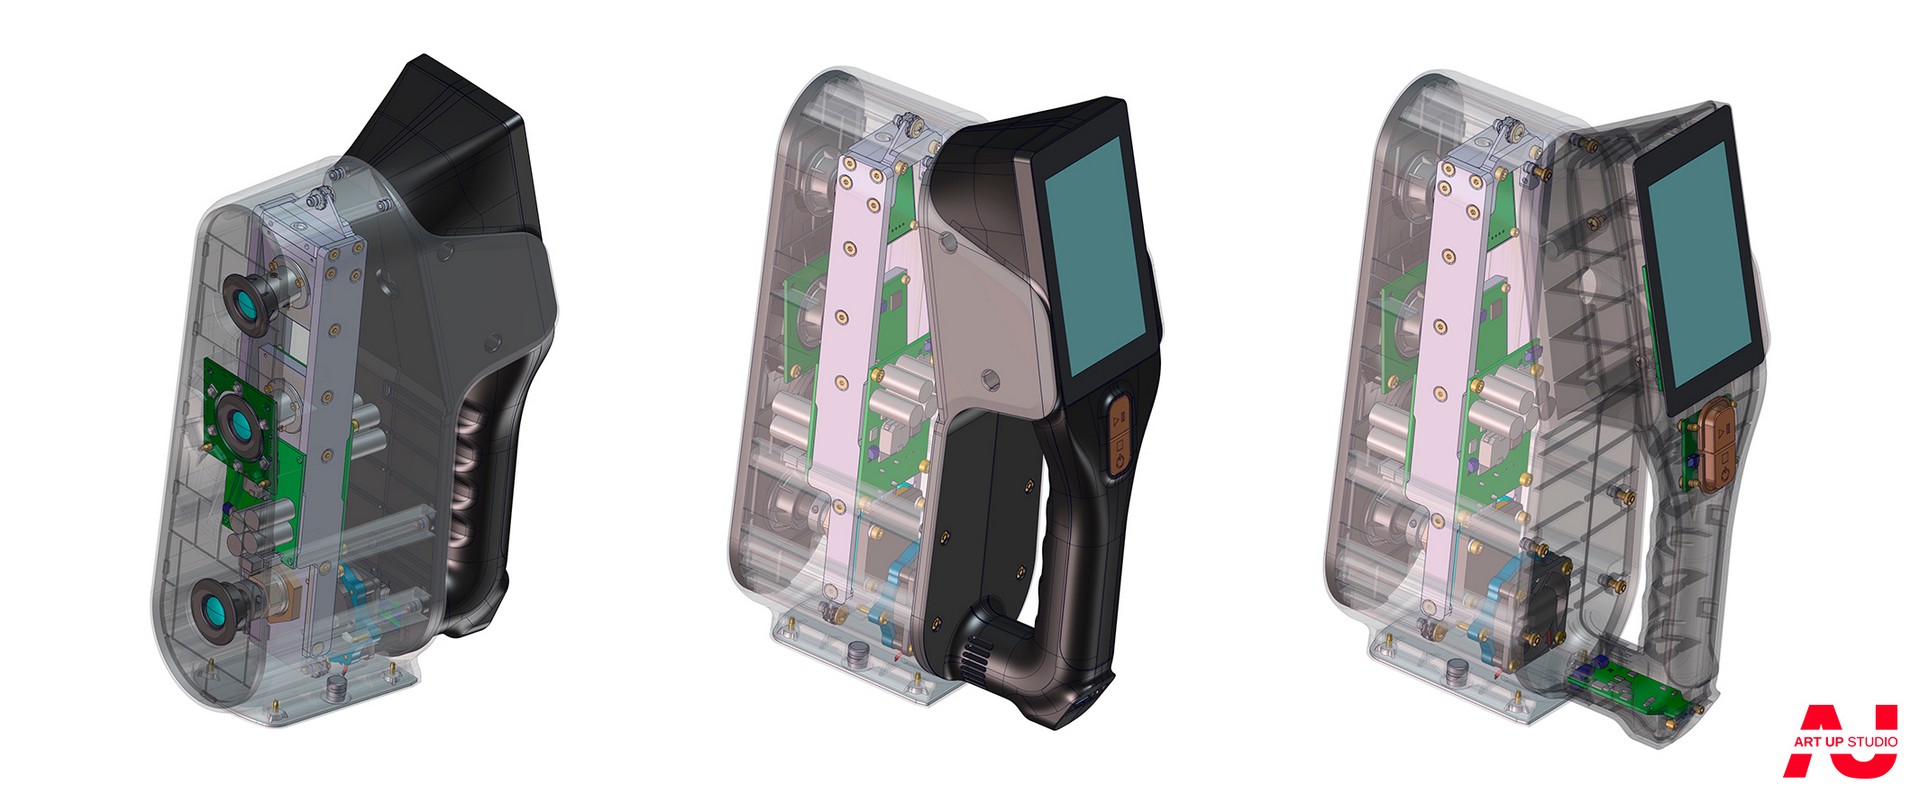
Developing construction
This section of the job was divided into the creation of the housing, handle, and calibration board, all of which presented us with a variety of challenging difficulties.
Design of the body:
The container design process was separated into two stages: direct body design and bracket design for electronics and optical design.
Prior to creating the bracket, many responsibilities were assigned:
* Vibrations from the device's body should not have been transferred to the bracket, since this would have resulted in a severe loss of scanning accuracy.
* The bracket's design has to be such that it could be manufactured using both metal casting and machining with minor alterations.
* Prior to final assembly, the optics and all electrical components must be pre-calibrated on the bracket.
On the basis of the foregoing specifications, it was determined to untie the bracket and body so that they did not form a hard connection. This was accomplished by attaching the bracket to the body using rubber dampers. It was determined that the bracket would be designed for metal casting first, and then refined for milling (meaning to reduce the cost of manufacturing using this technology as much as possible). As a result, we acquired a bracket design that was so technologically sophisticated and cost effective to mill that the alternative of metal casting was abandoned.
When we designed the body, we established a primary goal of minimising visible components and fasteners while maintaining a highly advanced and cost-effective manufacturing process. As a result, the solid (closed body) alternative with the fewest technical parts within was chosen for improved flow and spillage.
The handle's construction:
The pen is a critical component of a portable 3D scanner, as it is the primary means of interacting with the device. The user should feel at ease when using the pen: it should fit nicely in the user's hand and should not "crunch" under the influence. It must be durable in addition to being convenient.
For the handle body, the following specifications have been established:
* the handle should have the fewest possible component joint lines;
* This product requires a strong handle assembly.
* All handle components must be assembled using latches; screws or micro screws are not permitted.
*The device's primary connection, USB, must function properly. During installation, the wire must not be severed.
The scanner handle device was separated into four pieces to meet the specifications outlined above:
* Two substantial and sturdy parts that serve as the "foundation" for the main body's installation. The halves are secured together with latches, and the inside electronics are fastened into their slots.
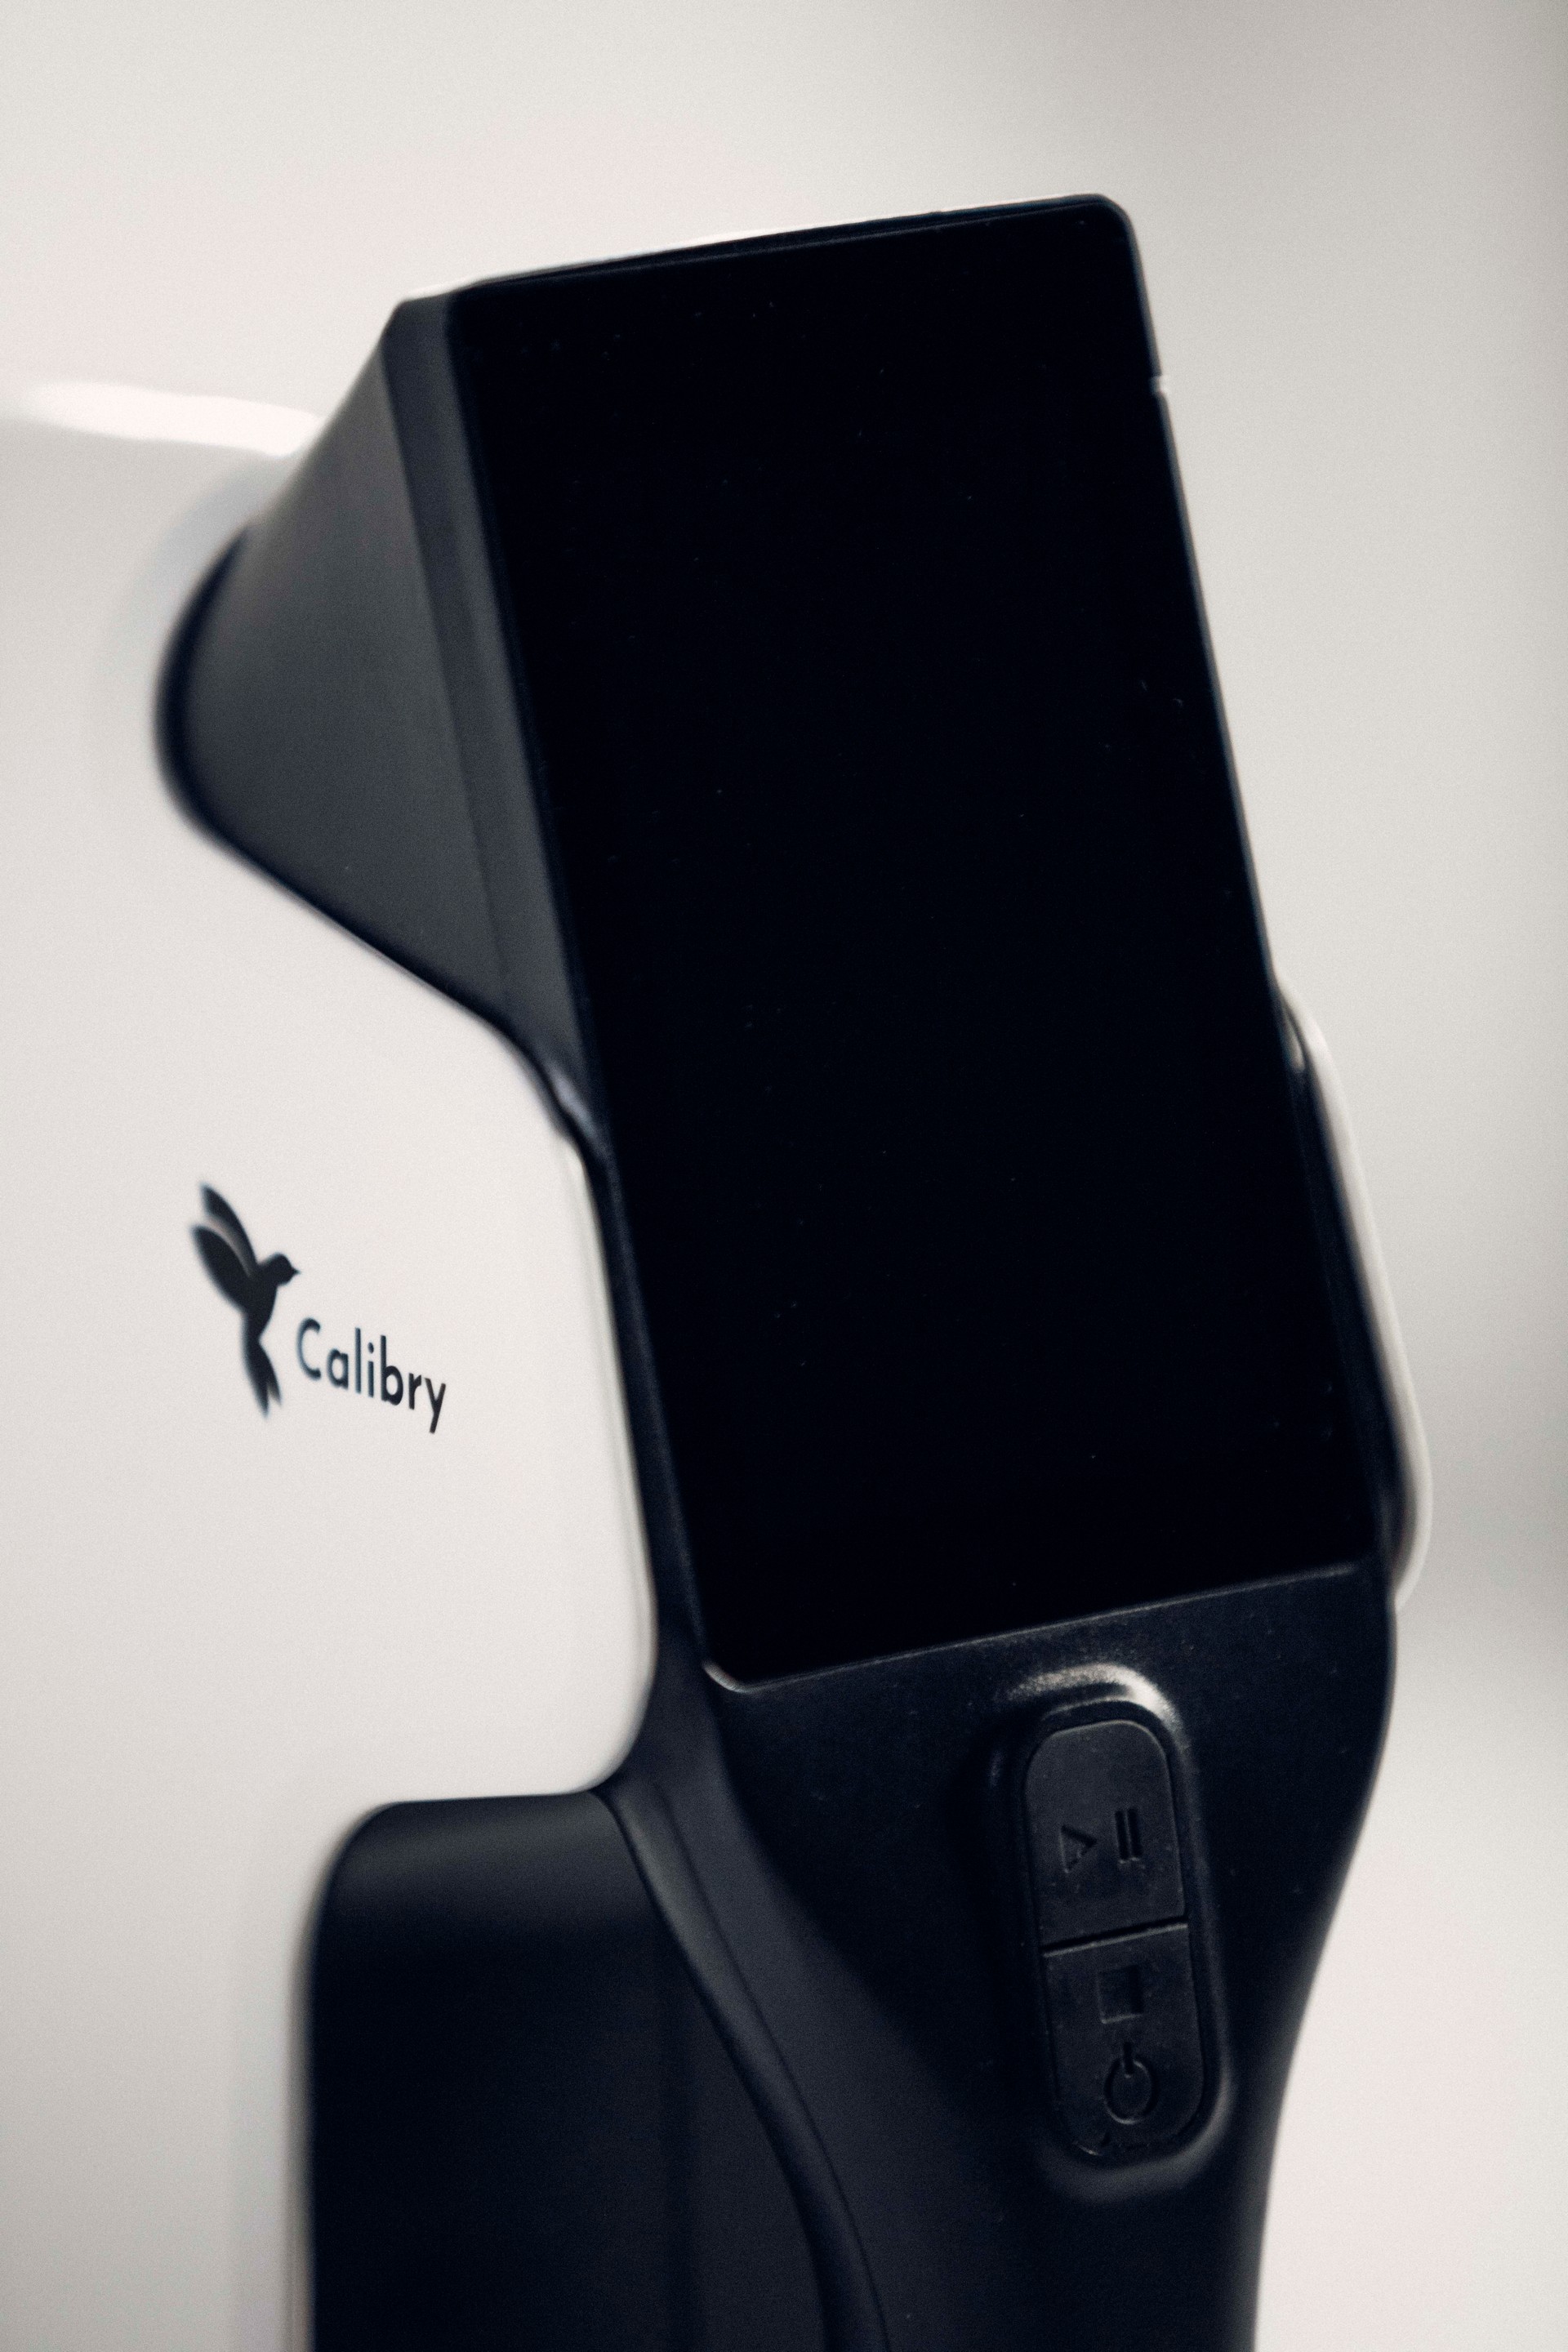
*A front panel that snaps into the above-mentioned assembly unit. Externally, the front panel places and embellishes the display. Additionally, a control button with many functions is mounted on the panel. We designed the button rubber to prevent it from accidentally activating the wrong functionalities when pressed and to make it tactilely pleasant.
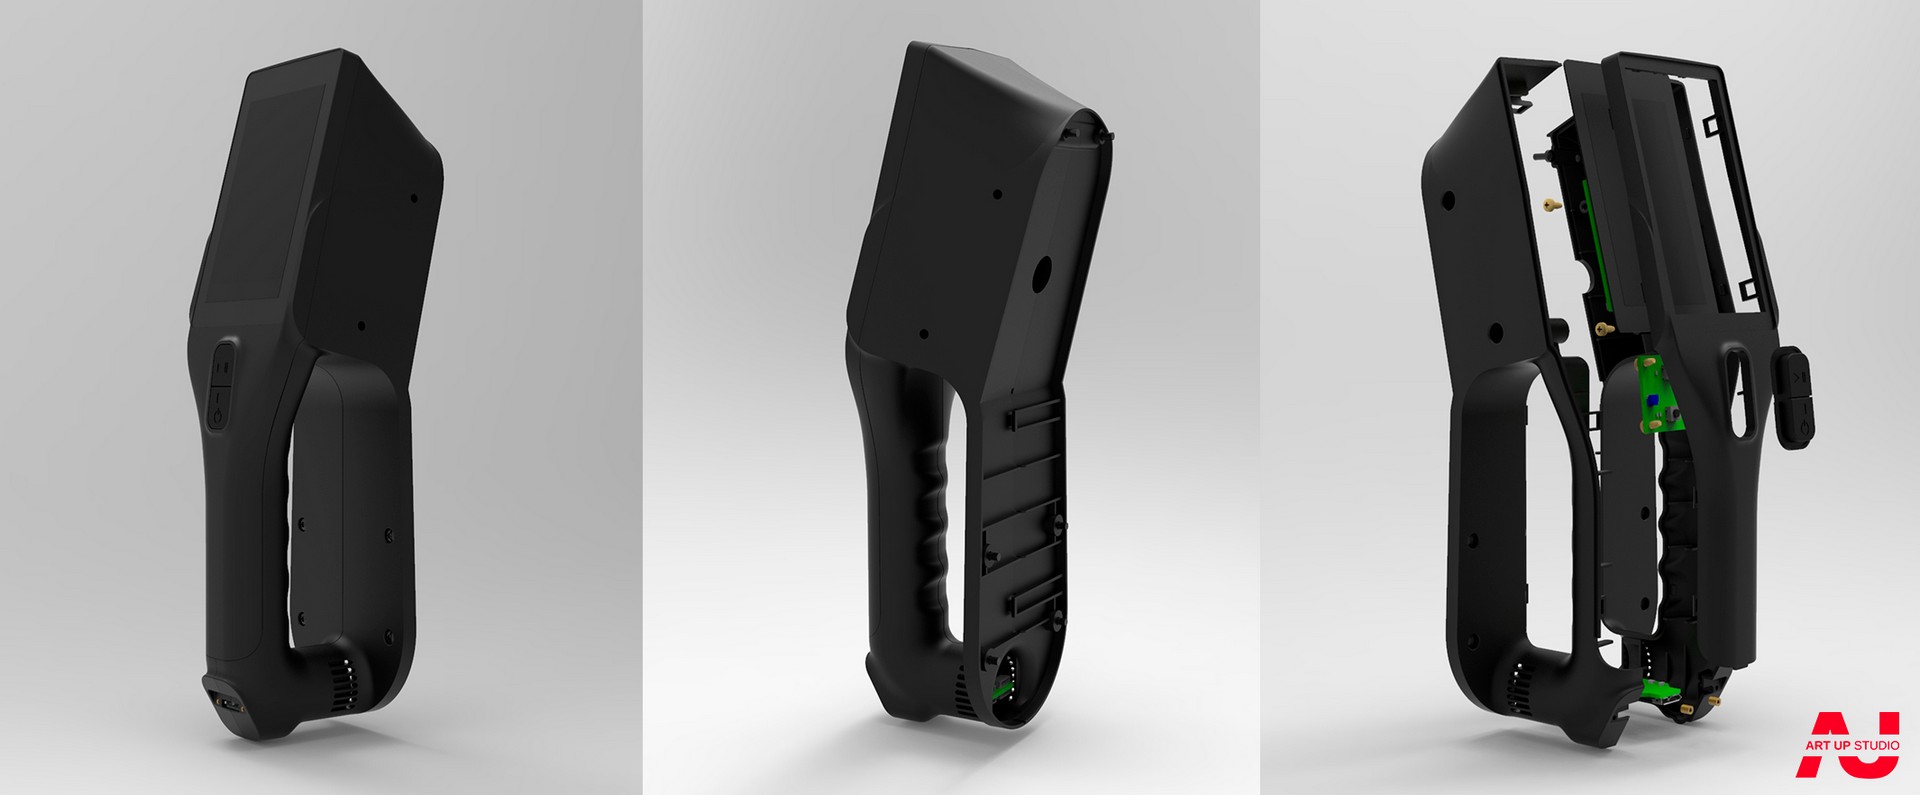
We encouraged electronics experts to alter the geometric design of the primary printed circuit board in order to facilitate the assembly of the device's interior components. We advised shrinking it to fit the board entirely within the handle. This simplified and clarified the assembling process.
The scanner is powered and data is sent to the computer through a USB port located on the device's handle. The USB must endure the wire's acute loads, resist being yanked out, and remain intact ( "The USB cable connection point on the scanner is the most responsible location. The USB cable will be tugged, bent, and attempted removal by walking on a stool leg "') A USB connector with a platform for installation through built-in screws was chosen (similar to what each of us witnessed in personal computers – VGA or DVI connectors for displays).
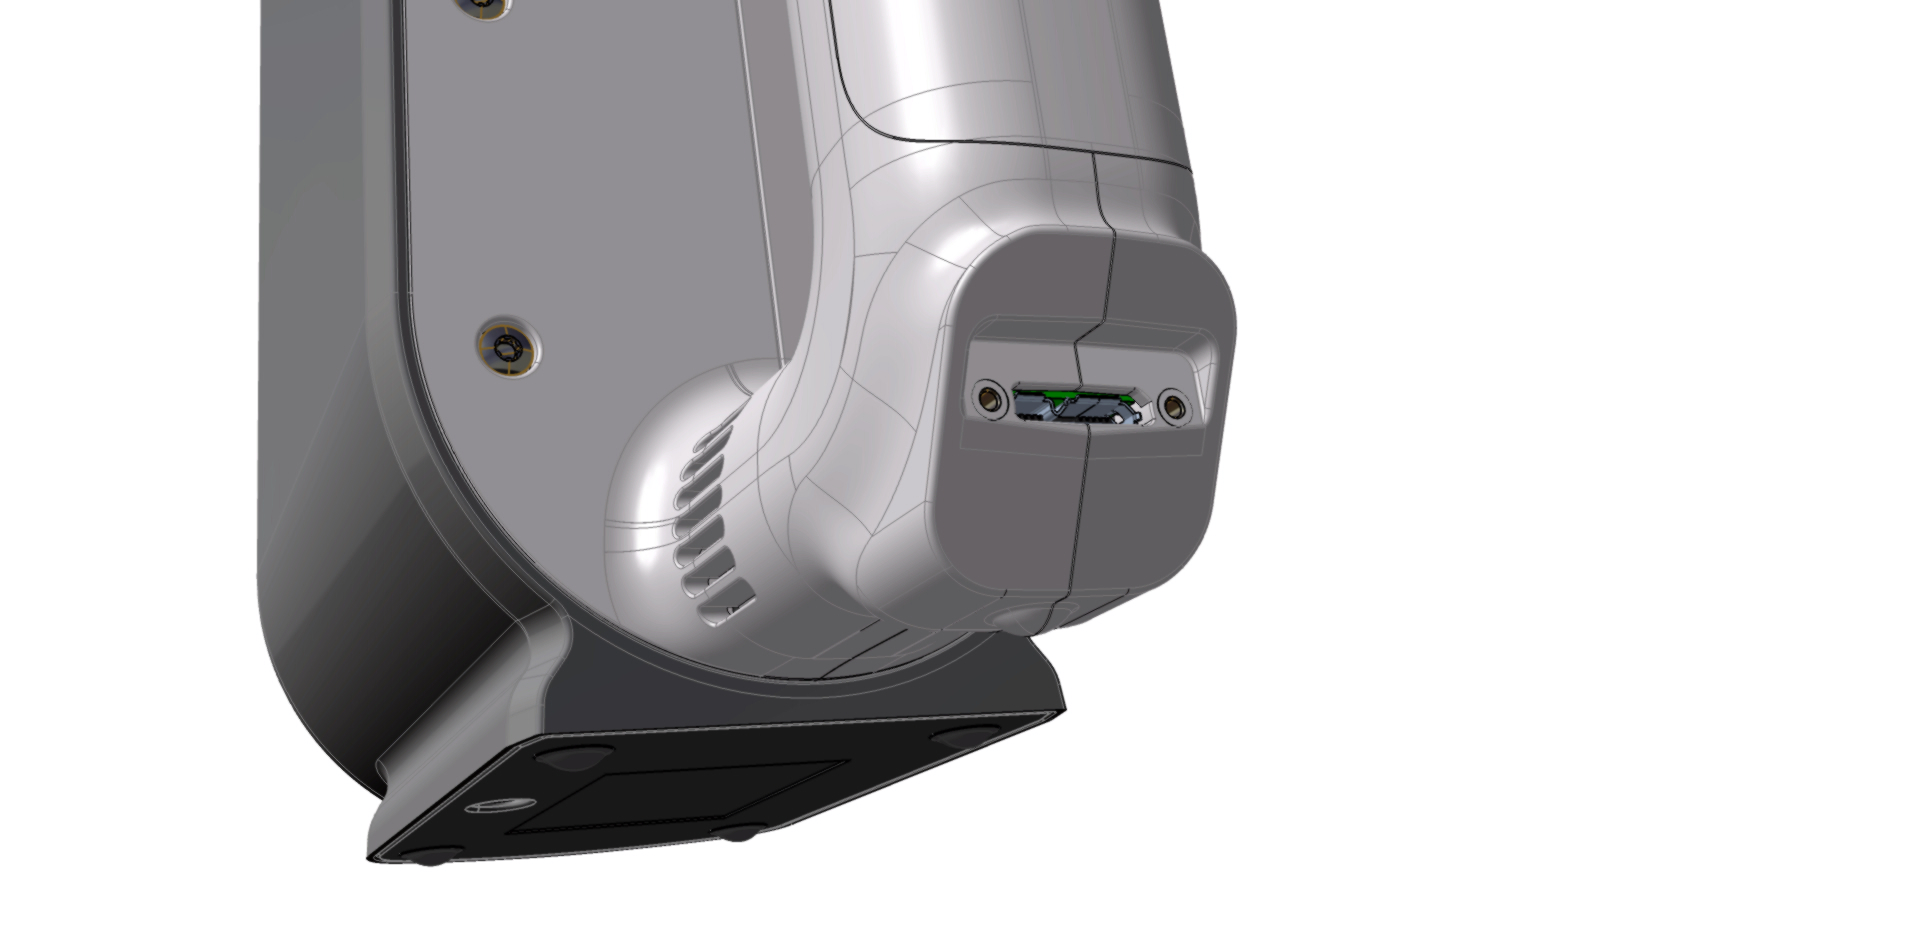
This is accomplished by inserting threaded bushings into the handle body's halves. These are extremely dependable axles. They are inserted directly in the mould, and the casting occurs quickly due to the presence of metal components within the plastic layer.
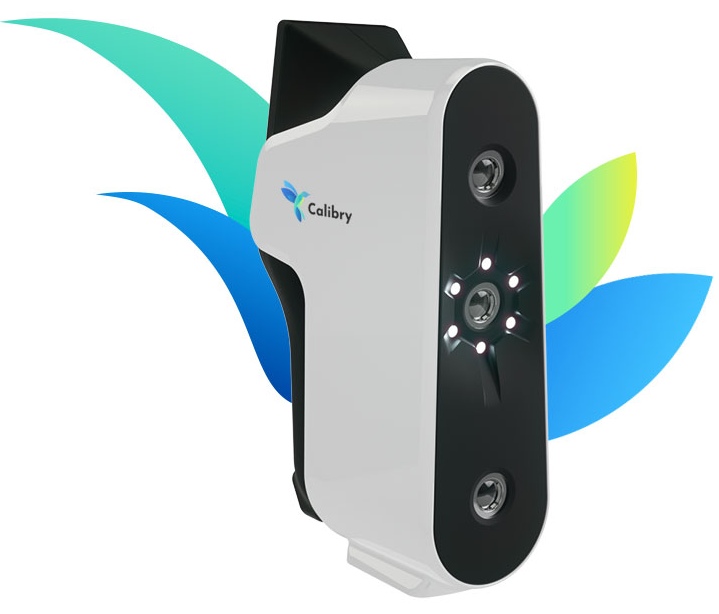
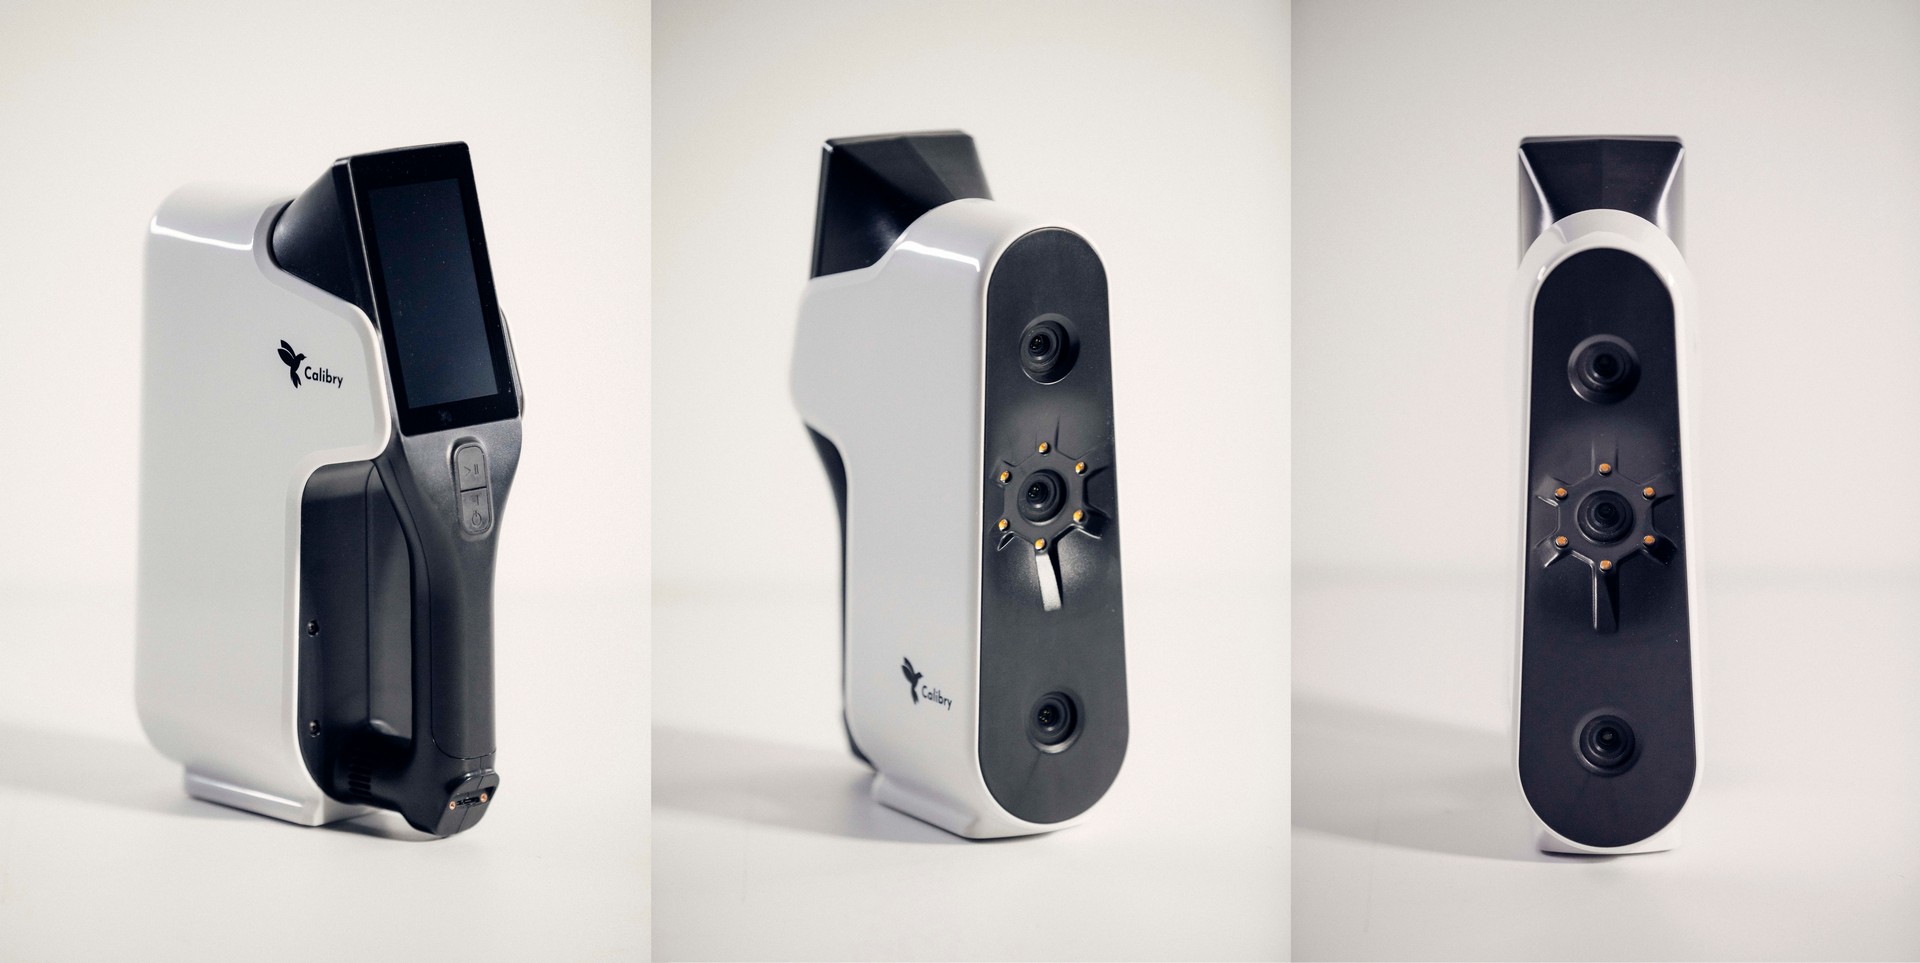
Result
As a result, we were able to create a very lightweight (956 grammes) and small portable scanner with an ergonomic design. We're thrilled to have the new gadget in our studio!
Designers: Maria Nikitina, Oleg Bazoev, Ilya Ishchenko
Design engineers: Vladimir Ternov, Nikita Pelevin
Art Director: Alexey Kutyaev
An impressive review was made of Calibry by the well-known founder of the Fabbaloo 3D printing portal, Kerry Stevenson (@fabbaloo), where the high quality and ergonomics of the device were noted.
Links to the Kerry Stevenson review in 4 parts:
https://www.fabbaloo.com/2020/06/hands-on-with-the-calibry-3d-scanner-part-1
https://www.fabbaloo.com/2020/06/hands-on-with-the-calibry-3d-scanner-part-2
https://www.fabbaloo.com/2020/06/hands-on-with-the-calibry-3d-scanner-part-3
https://www.fabbaloo.com/2020/06/hands-on-with-the-calibry-3d-scanner-part-4
 IF Design Award 2019-2021
 Скачать бланк ТЗ
 Презентация